How
to install the Imagelys Plugin
|
Back
|
Welcome to Imagelys Plugin installation.
How to install the Imagelys Plugin for Photoshop for
PC under Windows.
 Step
1 Step
1
It's very important before starting the Plugin installation,
exit out of all Photoshop applications.
Step
2
Please head to the Imagelys Plugin folder and copy the .8bf
file you find there:
C:\Program Files\Imagelys Picture Lab\PictureLab_x64.8bf
Step
3
Next, navigate to the Photoshop Plug-ins folder, and paste
the .8bf file you just copied.
If you installed to the Photoshop version-specific location,
the Photoshop plug-ins folder is located here:
C:\Program Files\Adobe\[Photoshop version]\Plug-ins
Here are the various Photoshop CC Plug-in folders, by version:
Photoshop CC 2022 - C:\Program Files\Adobe\Adobe Photoshop CC
2022\Plug-ins\
Photoshop CC 2020 - C:\Program Files\Adobe\Adobe Photoshop CC
2020\Plug-ins\
Photoshop CC 2019 - C:\Program Files\Adobe\Adobe Photoshop CC
2019\Plug-ins\
Photoshop CC 2018 - C:\Program Files\Adobe\Adobe Photoshop CC
2018\Plug-ins\
Photoshop CC 2017 - C:\Program Files\Adobe\Adobe Photoshop CC
2017\Plug-ins\
Photoshop CC 2015 - C:\Program Files\Adobe\Adobe Photoshop CC
2015\Plug-ins\
Photoshop CC 2014 - C:\Program Files\Adobe\Adobe Photoshop CC
2014\Plug-ins\
Other location here:
Progam Files\Common Files\Adobe\Plug-Ins\CC\
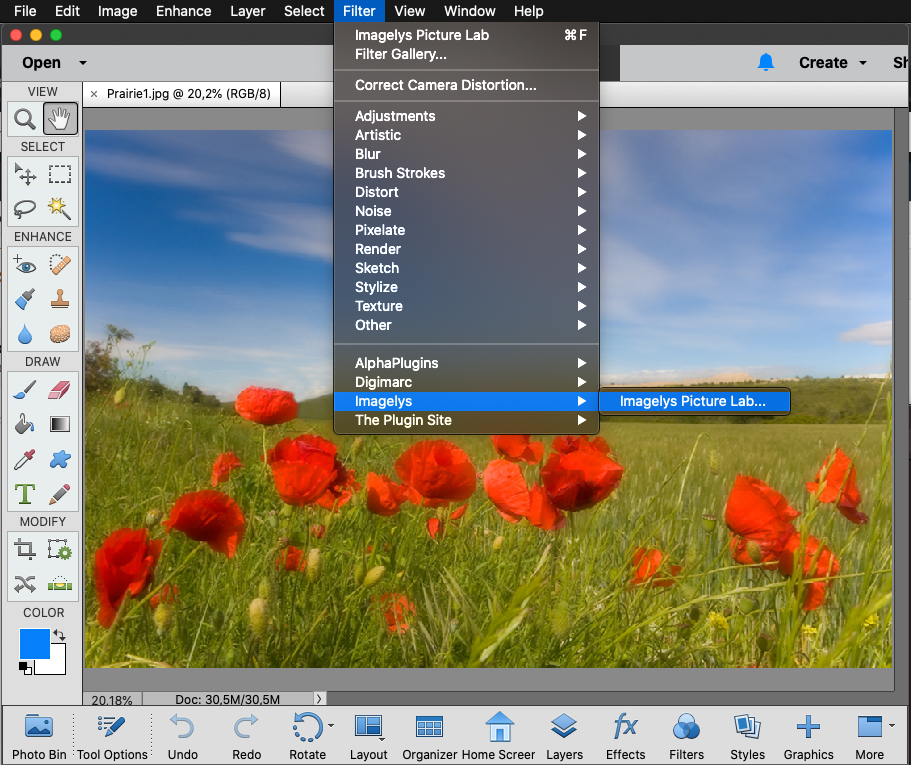
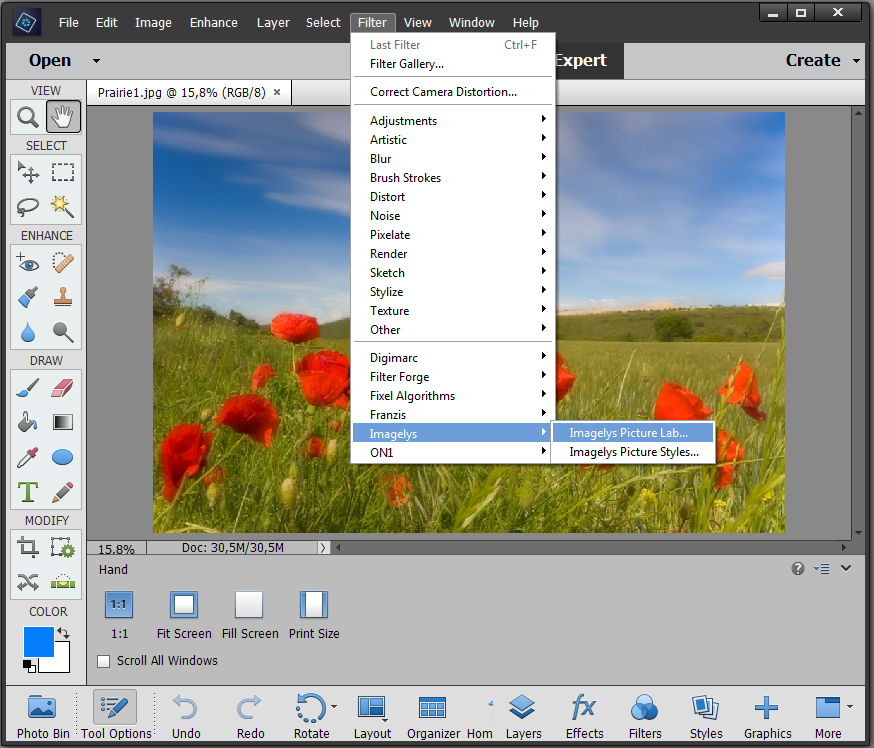
Step
4
If you are prompted, confirm that you want to paste the file
by pressing the Continue button. Start/Restart Photoshop,
and get to editing!. You should be able to see the Imagelys
Plug-in in the Filters menu.
How to install the Imagelys Plugin for Photoshop Elements
for Mac.
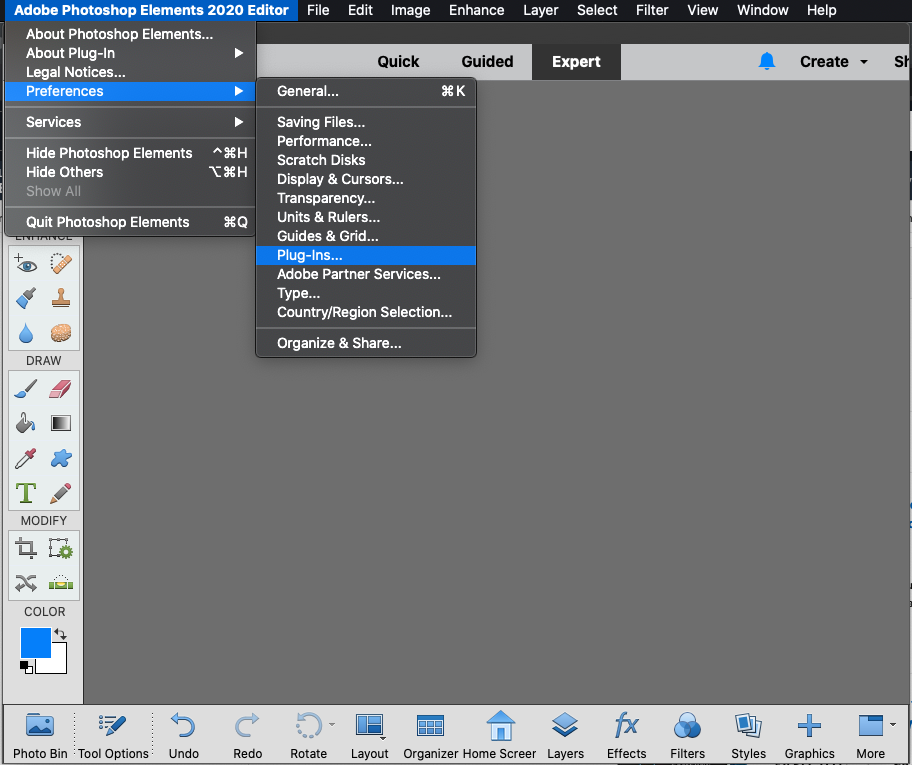
Step 1
Open Photoshop Elements, into the main menu, click
to Preferences and Plug-Ins.
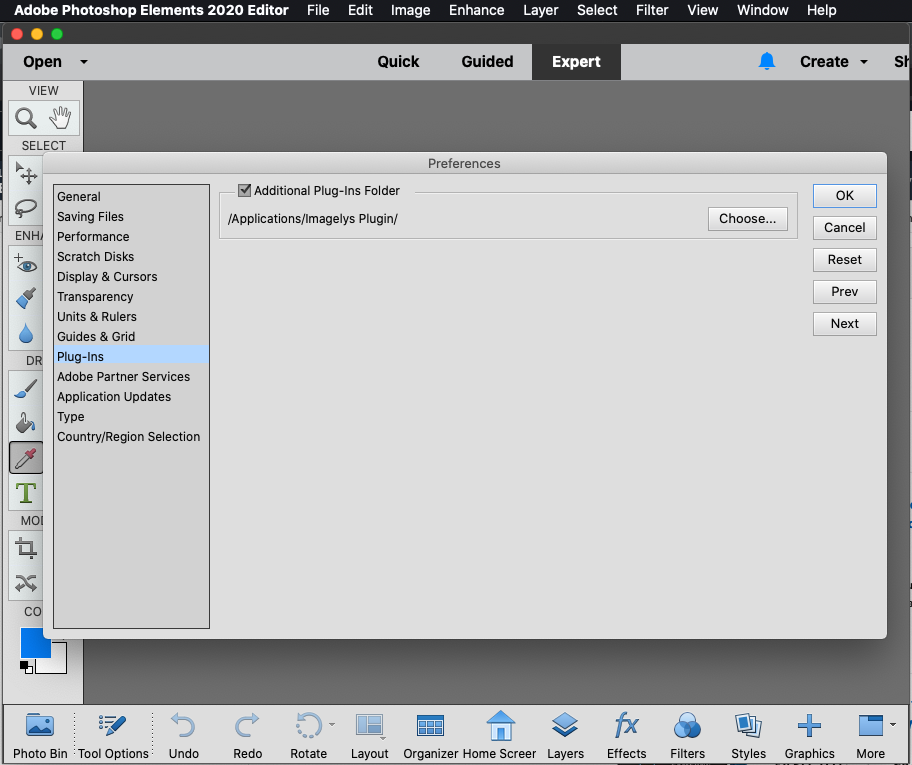
Step
2
Now, set the checkbox Additional Plug-ins Folder and
click the Choose button.
Step
3
Then, head to the Imagelys Plugin folder that you find
there:
Macintosh HD/Application/Imagelys Plugin/
Step
4
You should be able to restart Photoshop Elements and see the
Imagelys Plug-in in the Filters menu.
How to install the Imagelys Plugin for Photoshop Elements
for PC under Windows.
Step 1
Open Photoshop Elements, into the main menu, click
to Preferences and Plug-Ins.
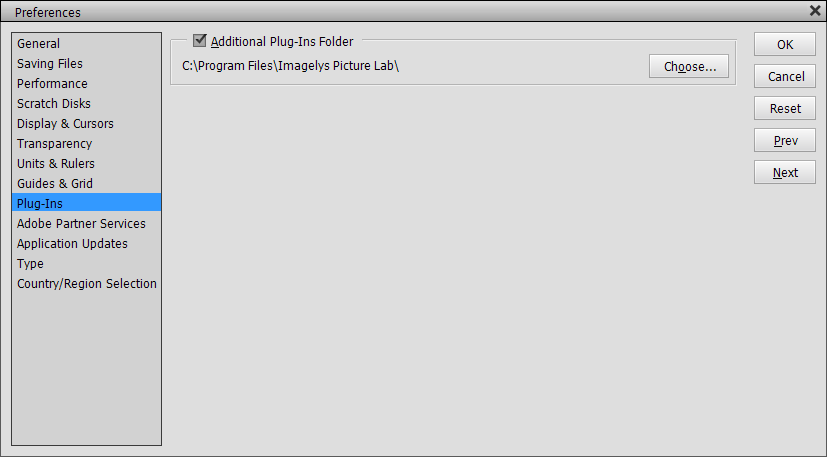
Step
2
Now, set the checkbox Additional Plug-ins Folder and click
the Choose button. Then, head to the Imagelys Plugin folder
that you find there:
C:\Program Files\Imagelys Picture Lab\.
Step
3
You should be able to restart Photoshop Elements and see the
Imagelys Plug-in in the Filters menu.
How to install the Imagelys Plugin for Affinity Photo for
PC under Windows.
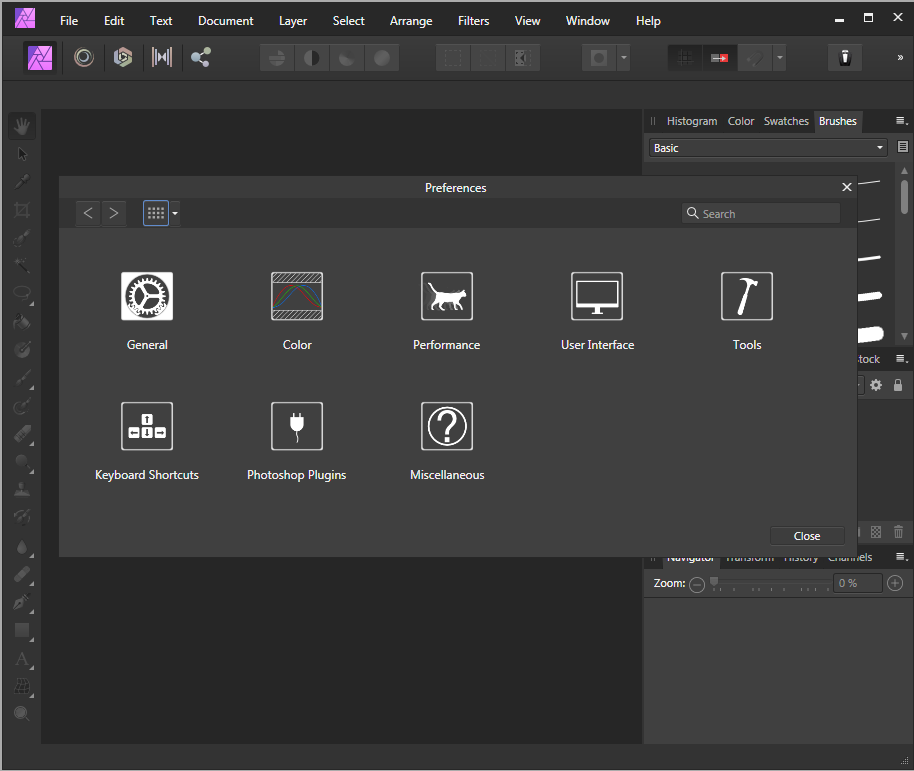
Step 1
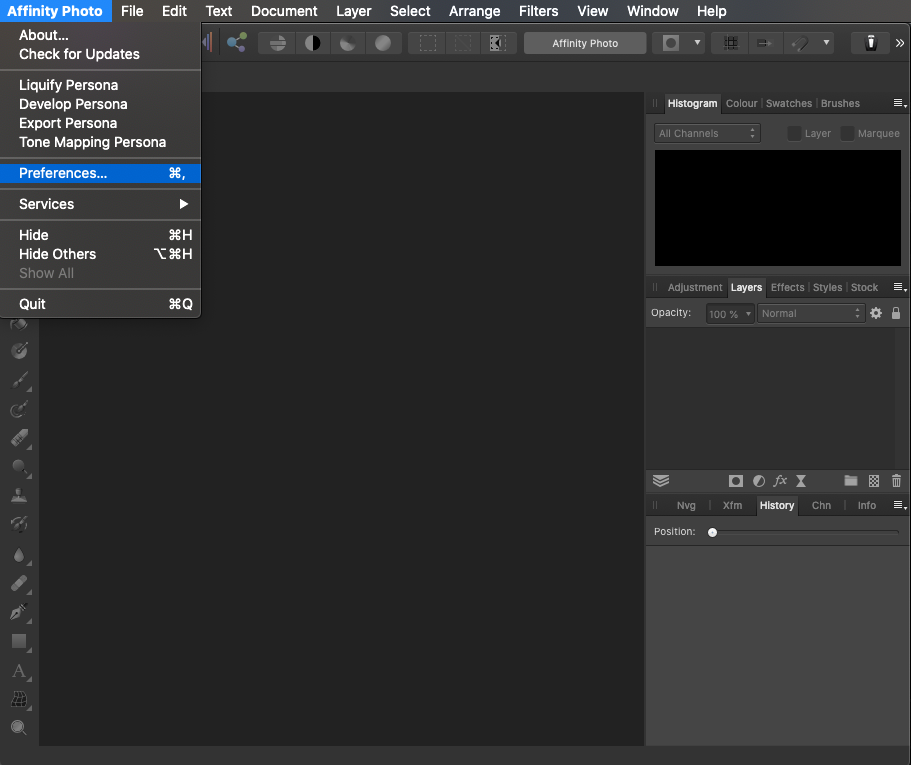
Open Affinity Photo, into the main menu, click to Preferences.
Step
2
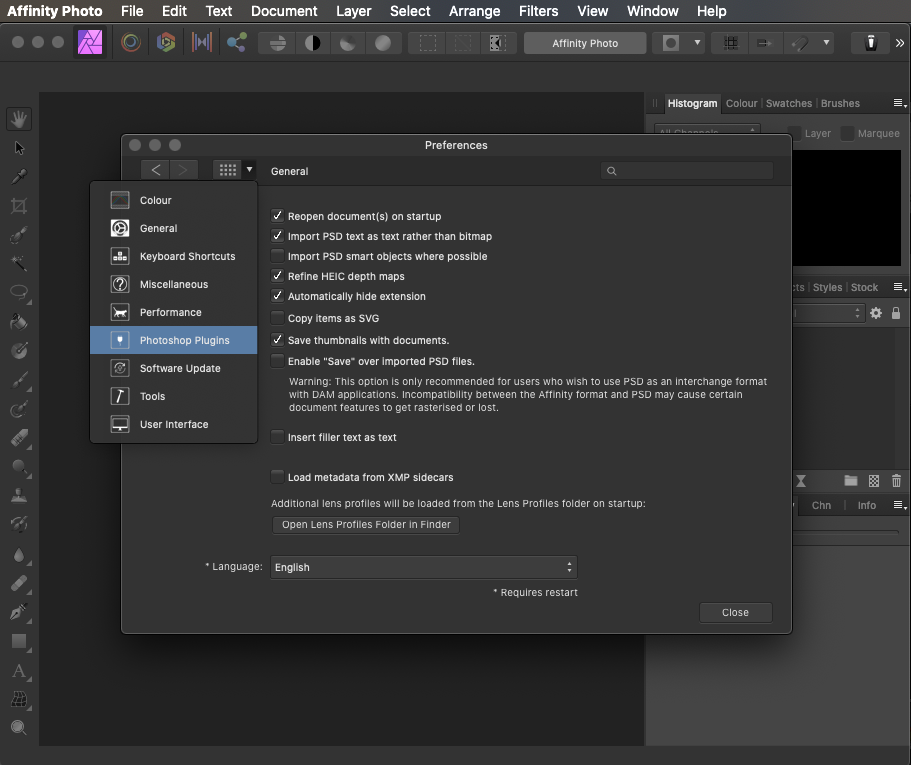
Now, click to Photoshop Plugins.
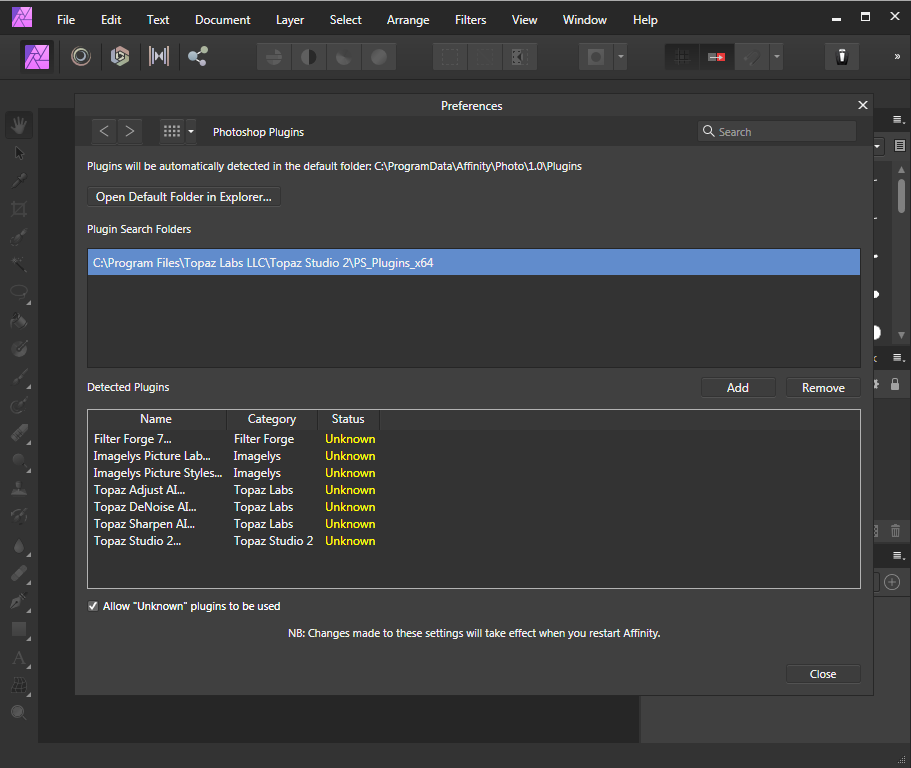
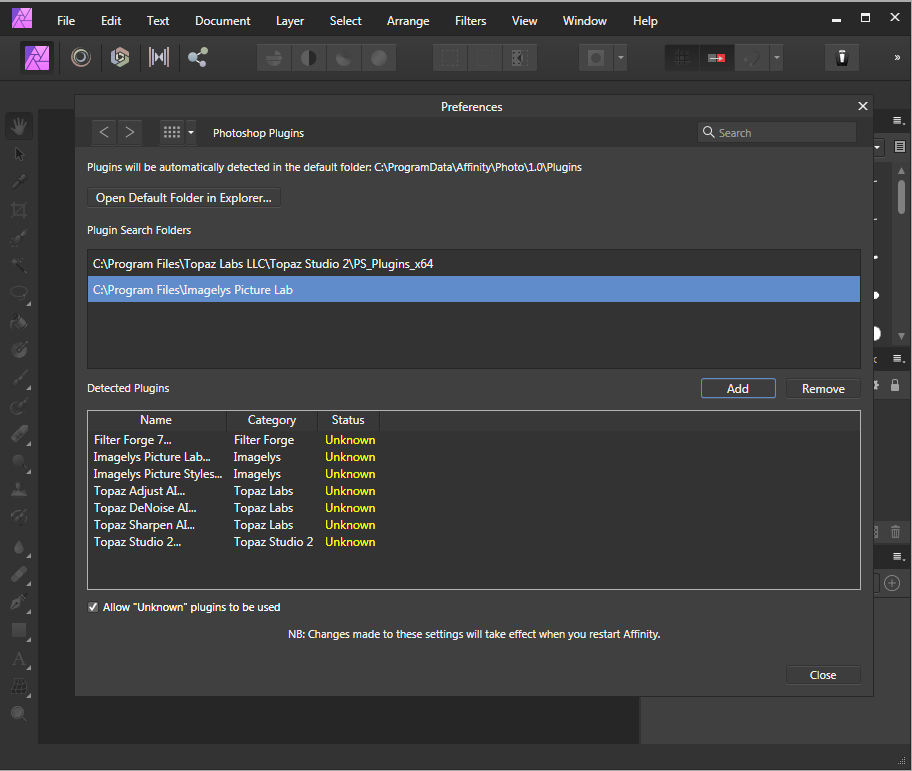
Step
3
Now, click the Add button.
Step
4
Then, head to the Imagelys Plugin folder that you find there:
C:\Program Files\Imagelys Picture Lab\.
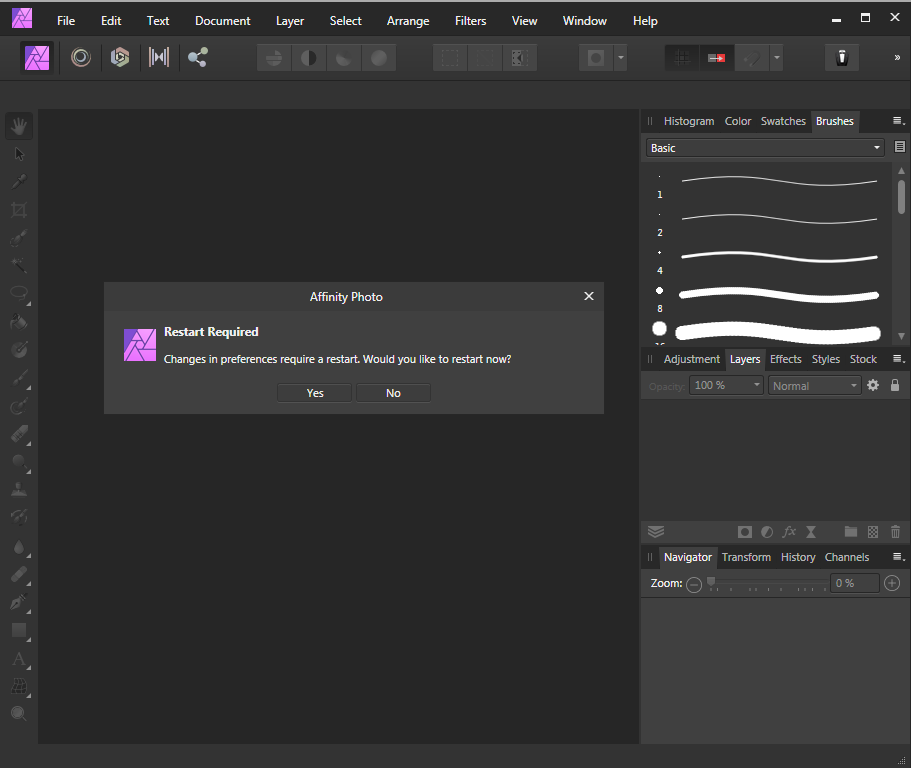
The new folder is add and to finish, click to Yes to restart
now.
Step
5
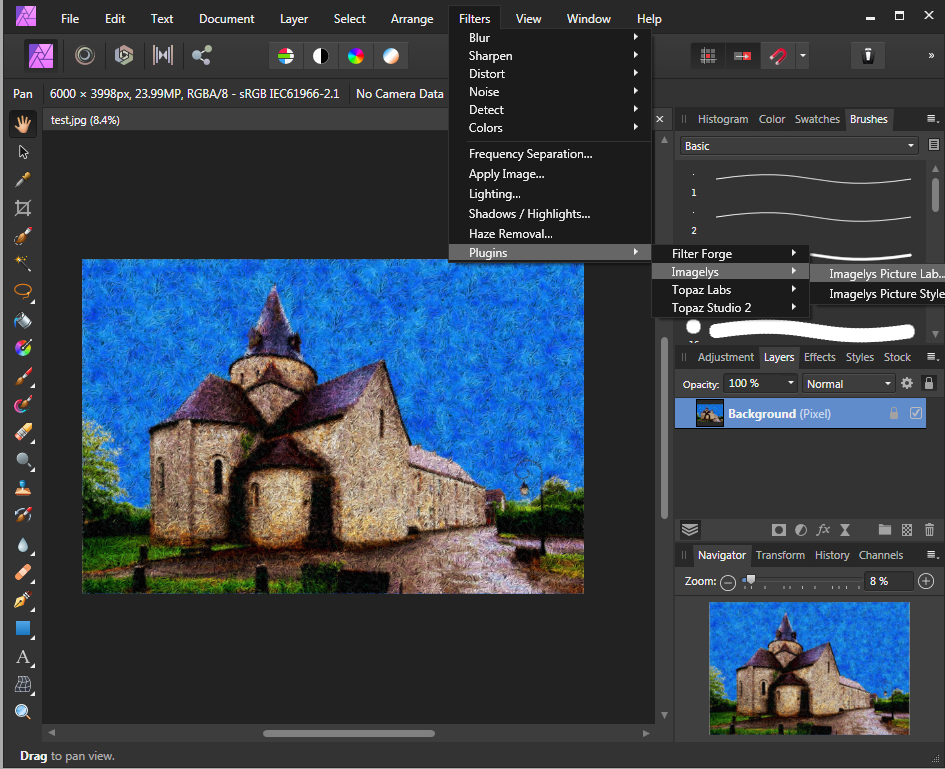
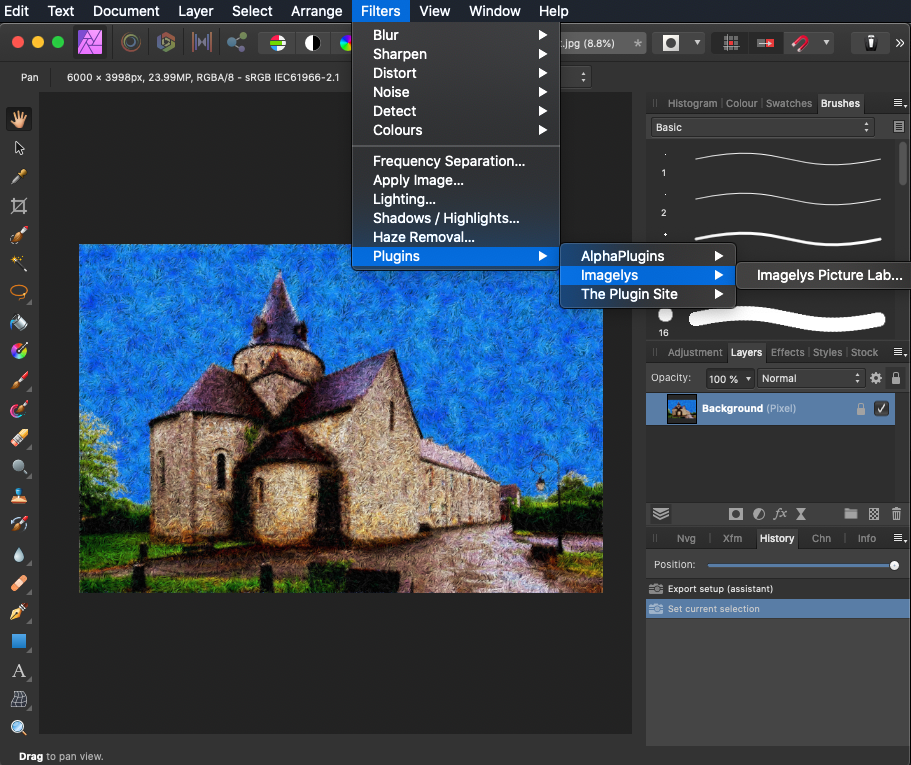
You should be able to restart Affinity Photo and see the Imagelys
Plug-in in the Filters menu.
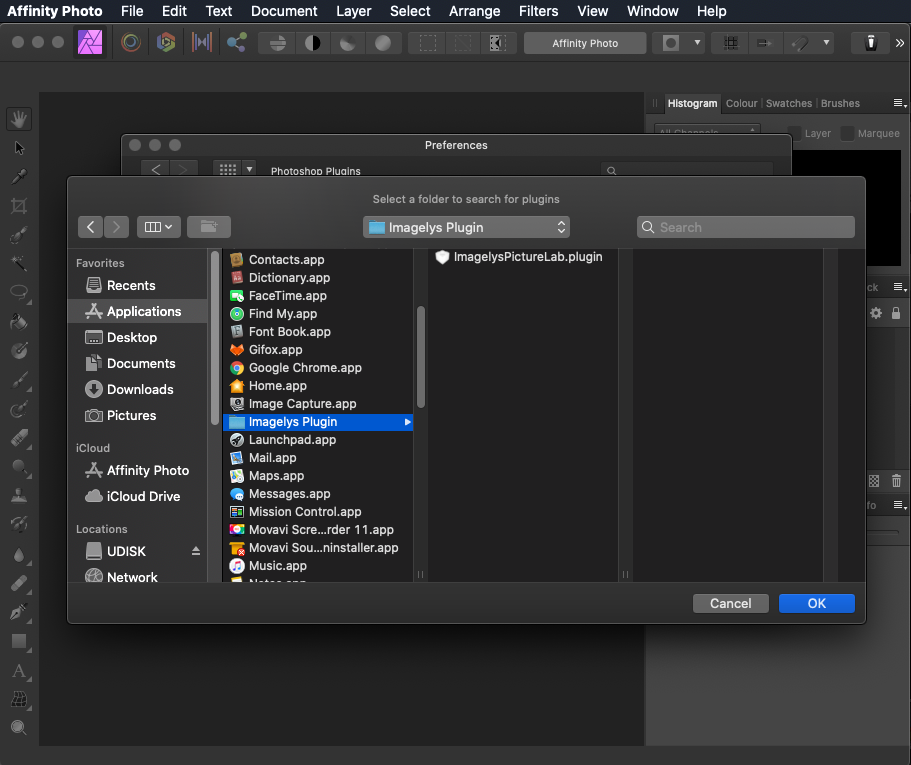
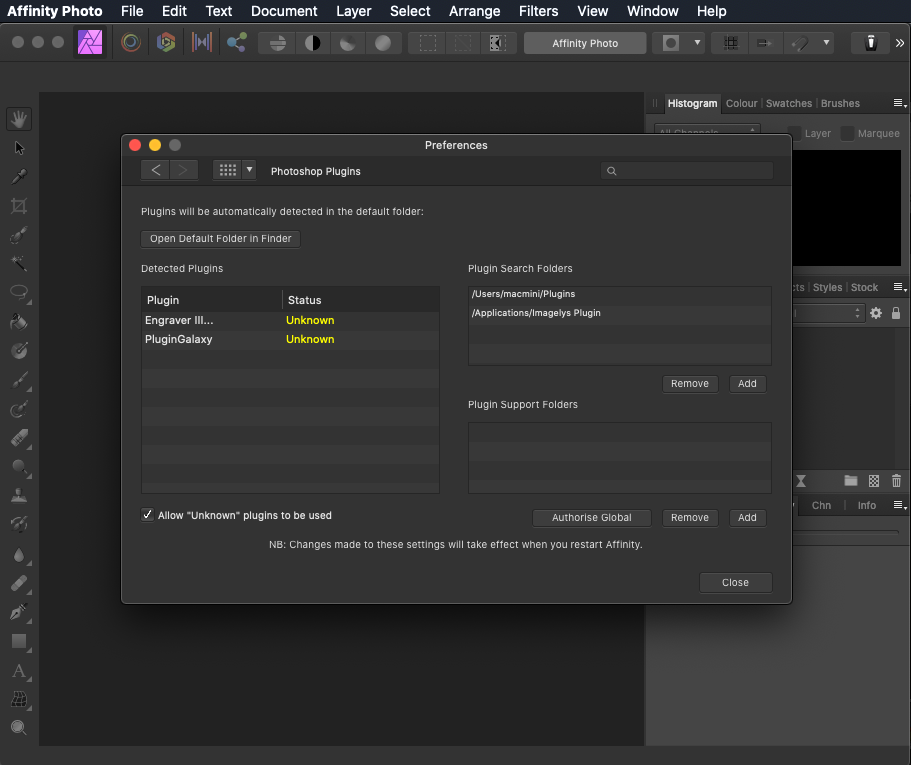
How to install the Imagelys Plugin for Affinity Photo for
Mac.
Step 1
Open Affinity Photo, into the main menu, click to Preferences.
Step
2
Now, click to Photoshop Plugins.
Step
3
Now, click the Add button.
Step
4
Then, head to the Imagelys Plugin folder that you find there:
Macintosh HD/Application/Imagelys Plugin/
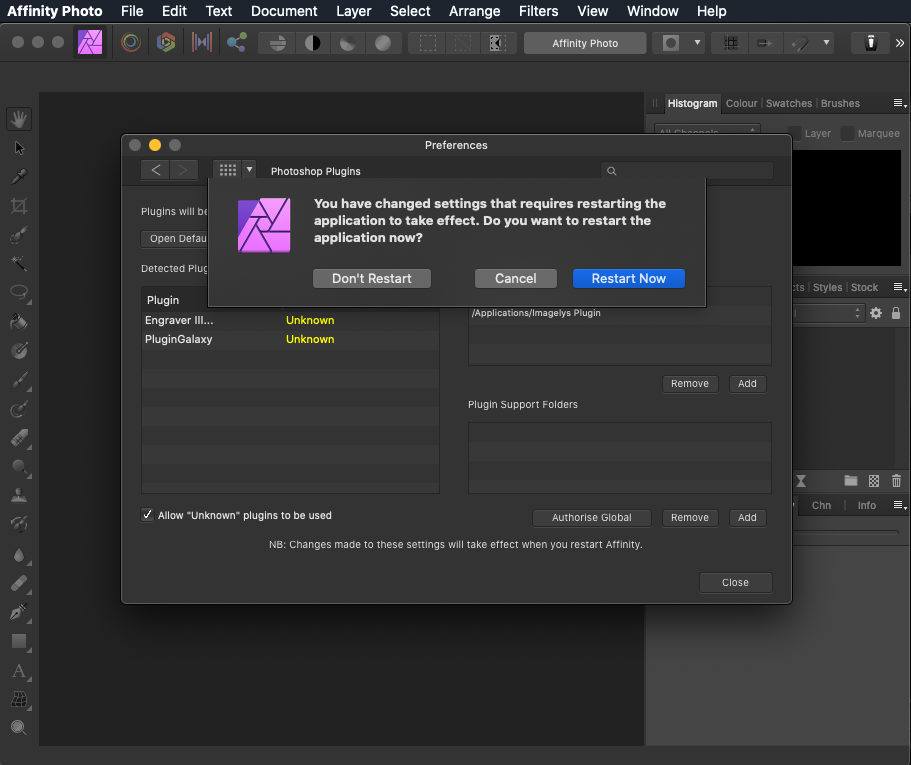
The new folder is add and to finish, click to Restart Now.
Step
5
You should be able to restart Affinity Photo and see the Imagelys
Plug-in in the Filters menu.
|