Apply
amazing Brush Strokes Texture effects to your images files
with Affinity Photo
|
Previous
Top
Next
|
You can apply Texture with brush strokes effects inspired by
Vincent Van Gogh to your images files very easily with Affinity
Photo. For Mac and PC only.
This tutorial uses two filters named Gogh FAA 08 and Gogh FAA
09 from the Imagelys Filter Library.
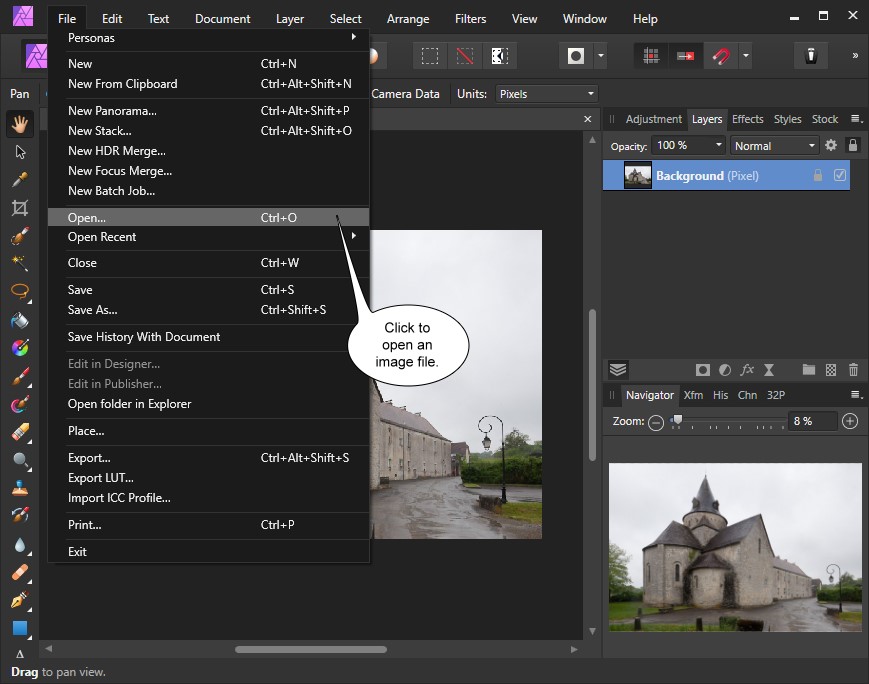
 Step 1 Step 1
With Affinity Photo, in the main menu, click to open and choose an image file.
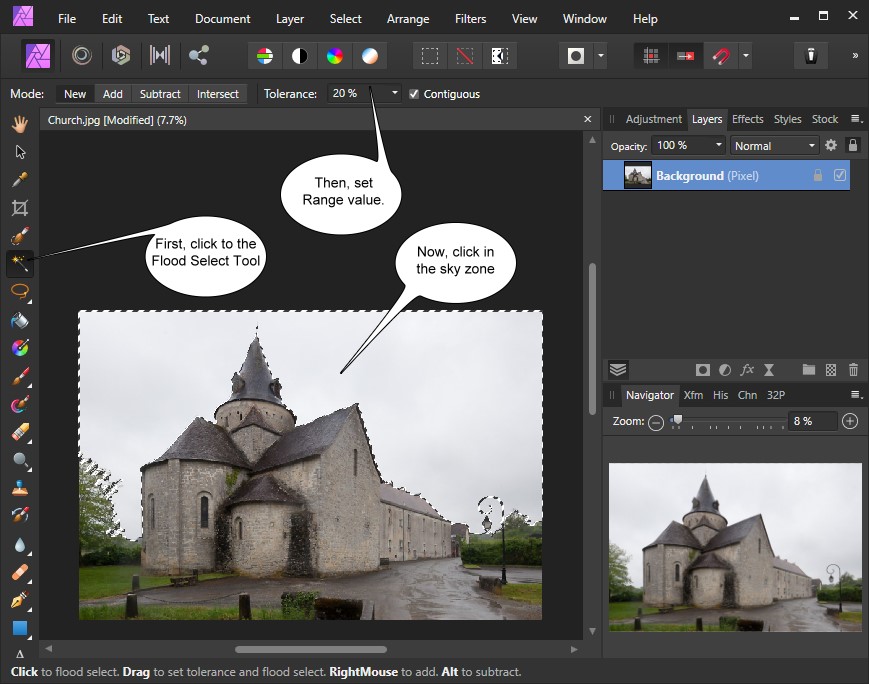
Step
2
Then, in the toolbar, click to Flood Select Tool and set the
Range value. Now, click in the sky zone.
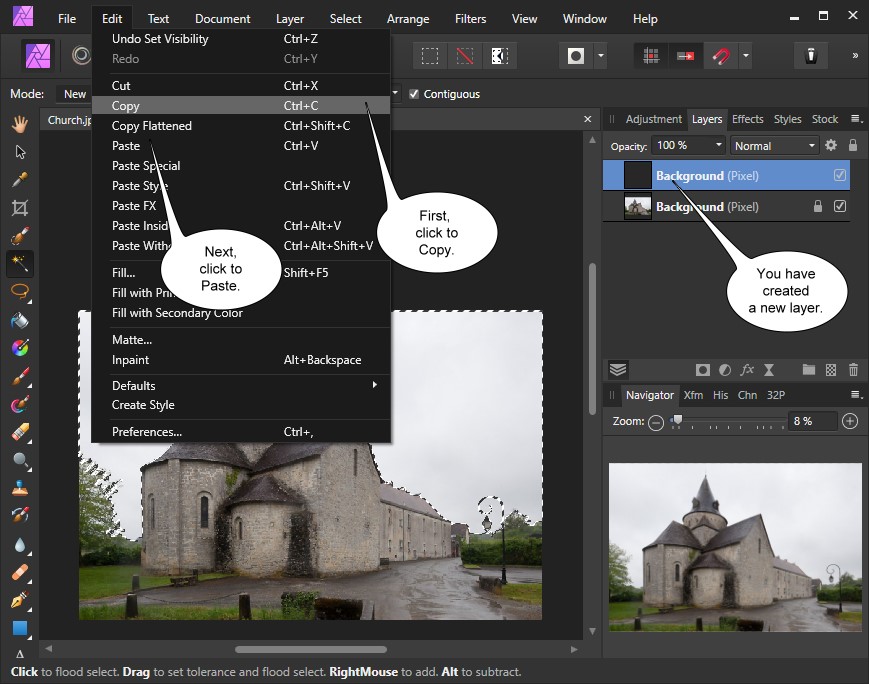
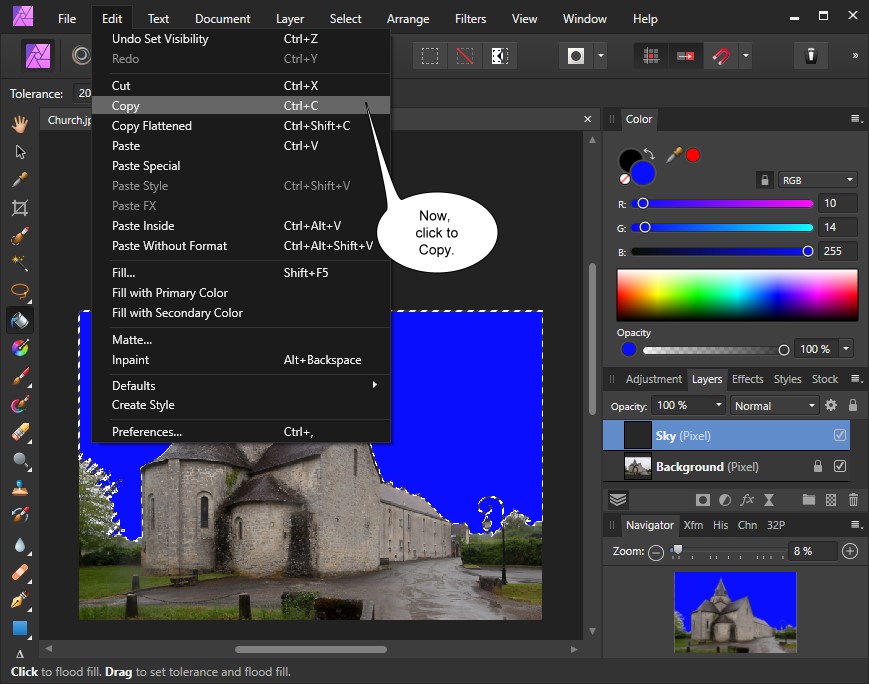
Step
3
Then, in the main menu, click to Copy and next click to Paste
for create a new layer.
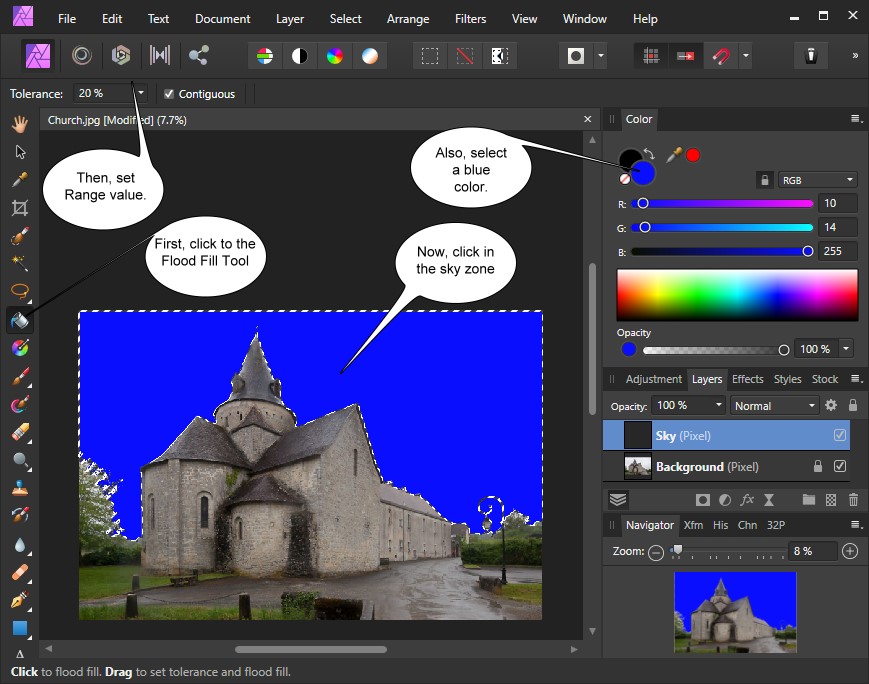
Step
4
First in this toolbar, click to Flood Fill Tool and chosse
a color. To finish the work, to click into the sky.
Step
5
Now, in the main menu, click to Copy.
Step
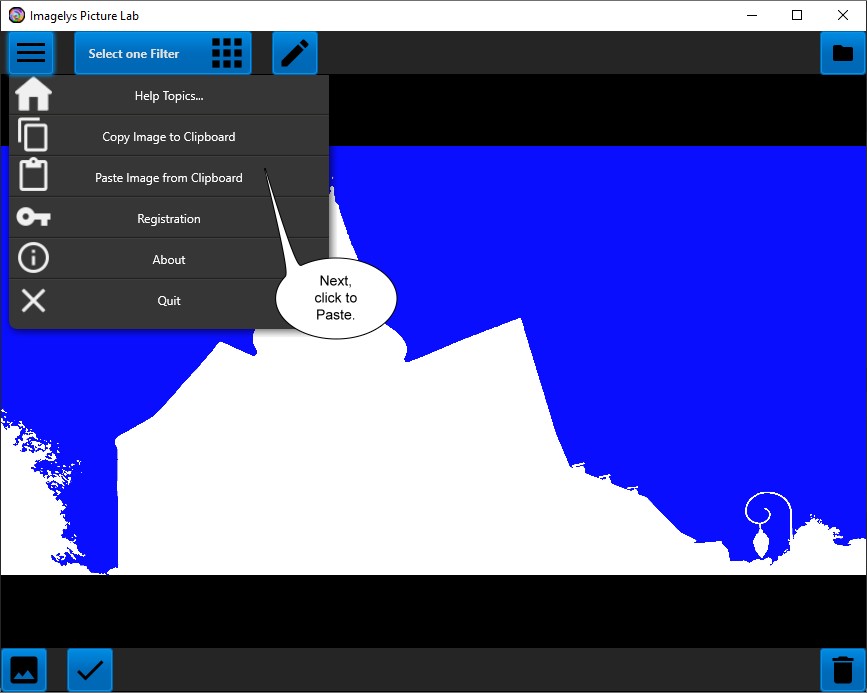
6
Now, open Imagelys Picture Lab and click to Paste image from
clipboard.
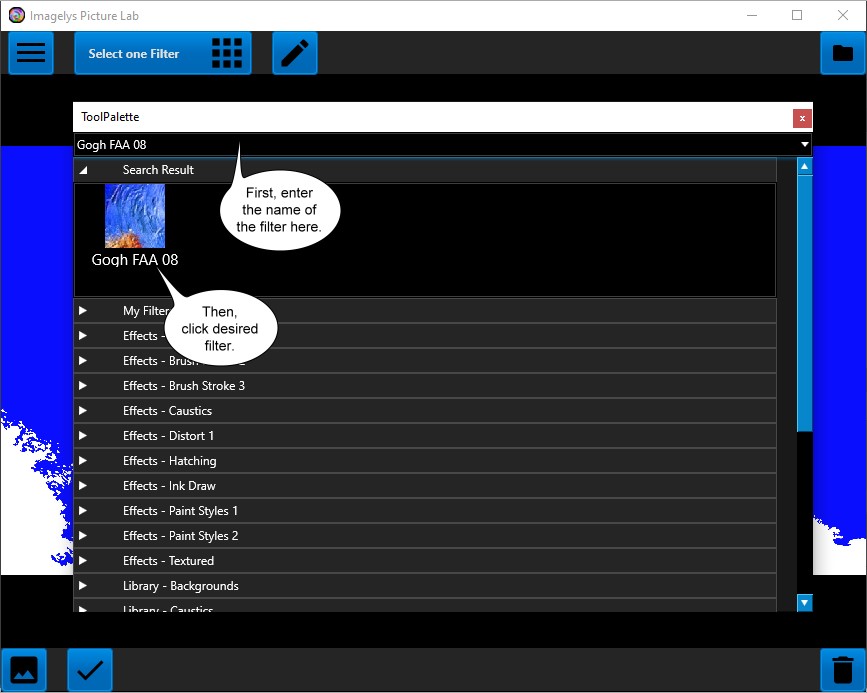
Step
7
Now, in the ToolPalette, enter the filter name "Gogh FAA
08" into the search bar, then click one of the filter icons.
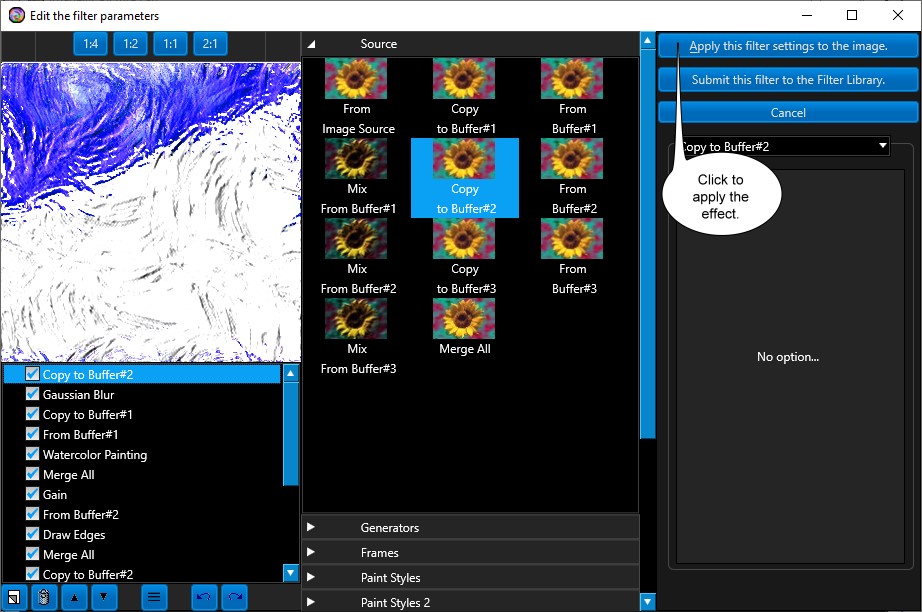
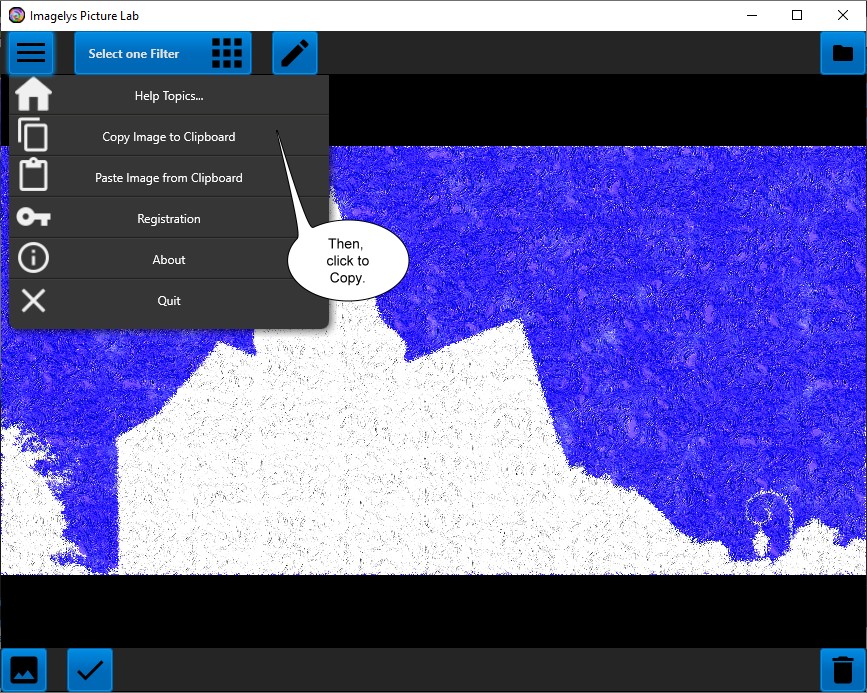
Step
8
After a little while (the rightmost portion of the status bar
shows the progress), the rendered effect will be displayed.
Then, click to copy image to clipboard.
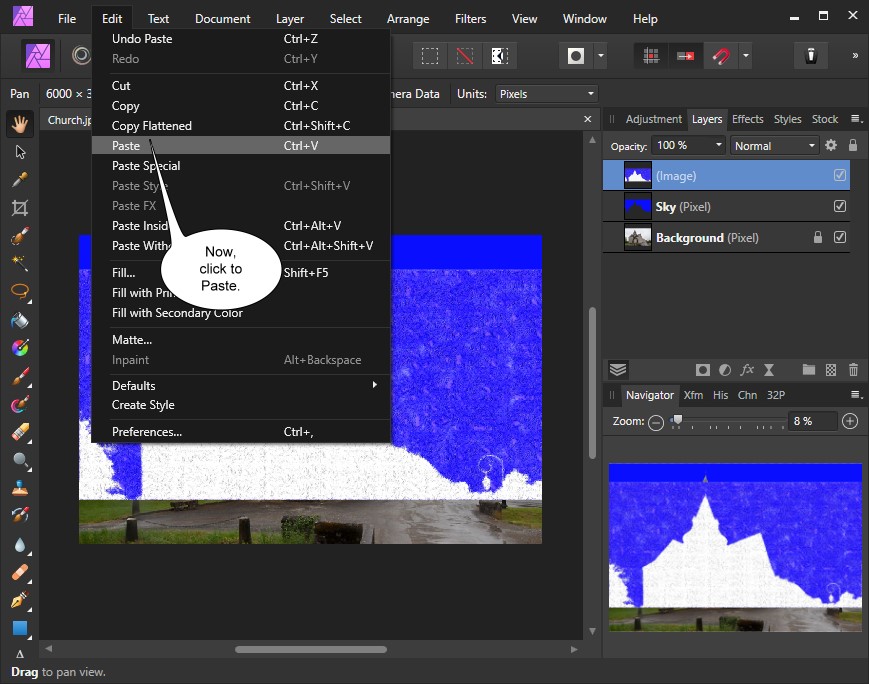
Step
9
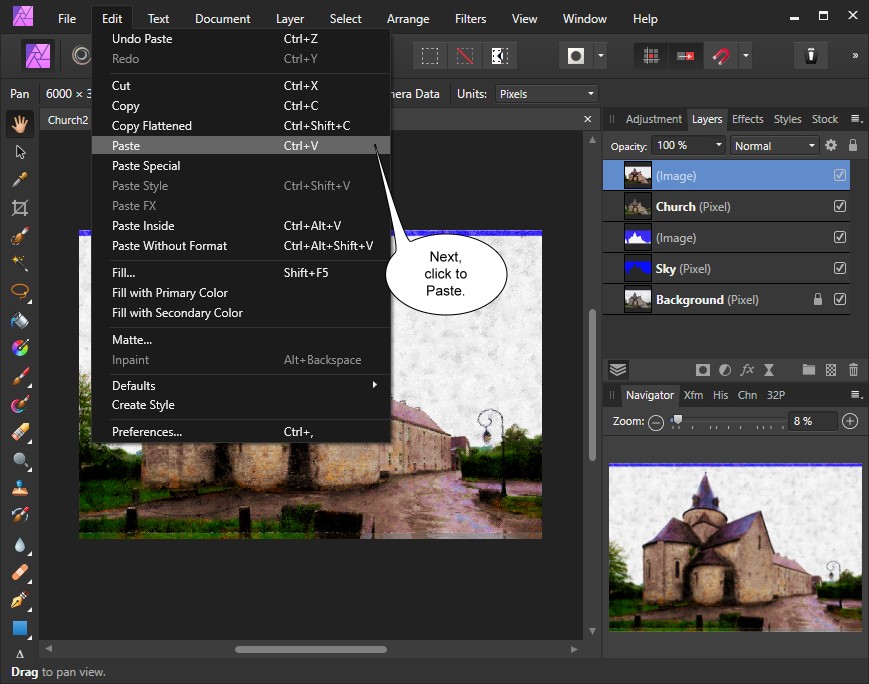
Now, into the main menu, click to Paste.
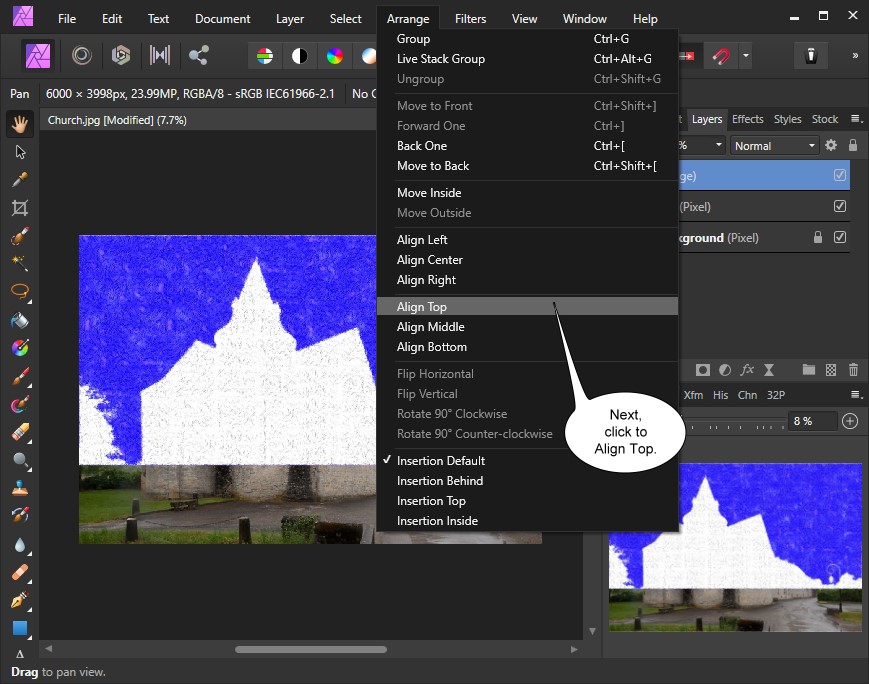
Step
10
Next, into the main menu, click to Align Top.
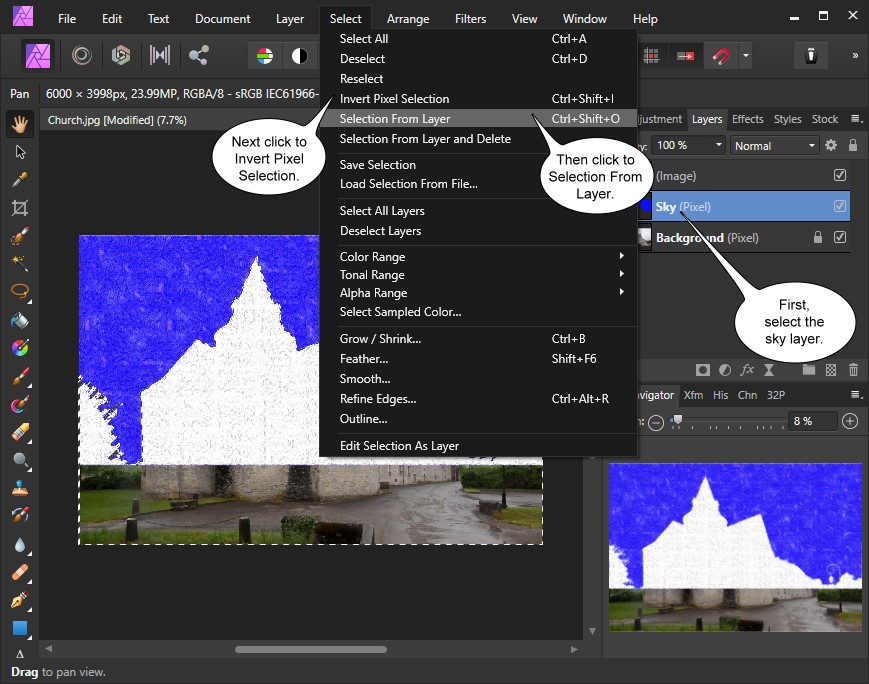
Step
11
First, select the sky layer. Then click to Selection From Layer.
Next, click to Invert Pixel Selection.
Step
12
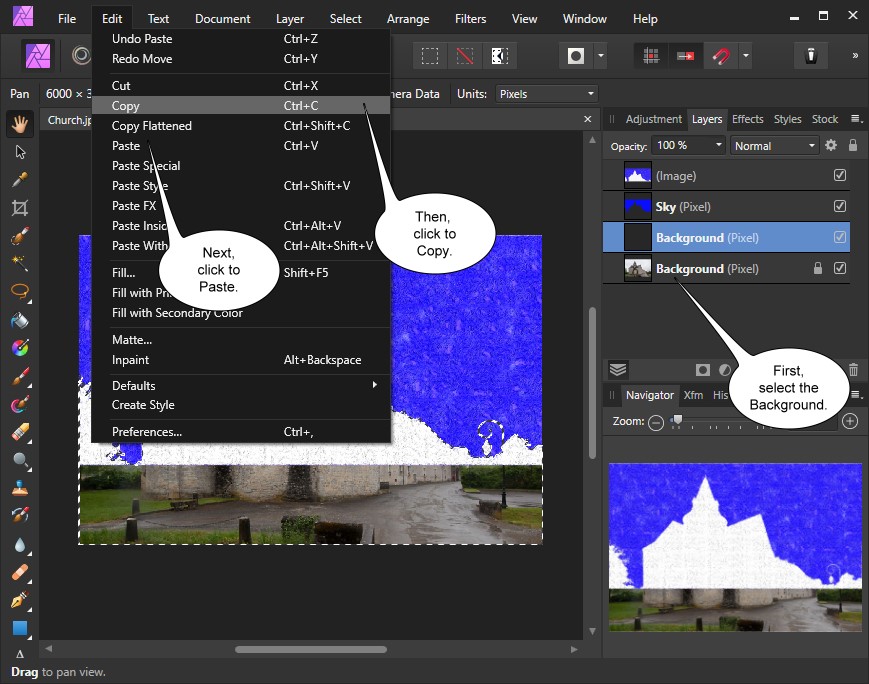
First, select the Background. Then click to Copy. Next, click
to Paste.
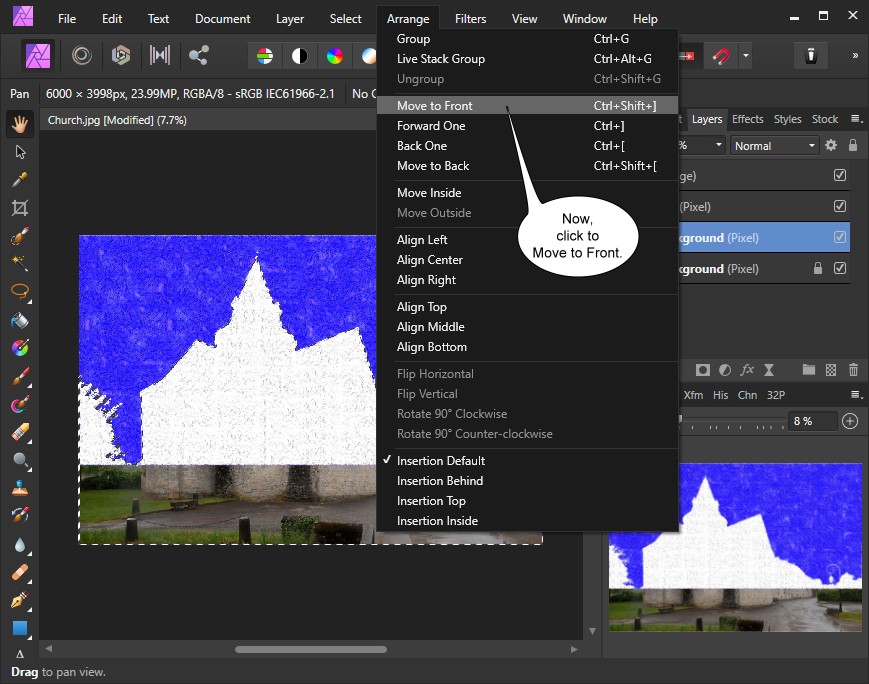
Step
13
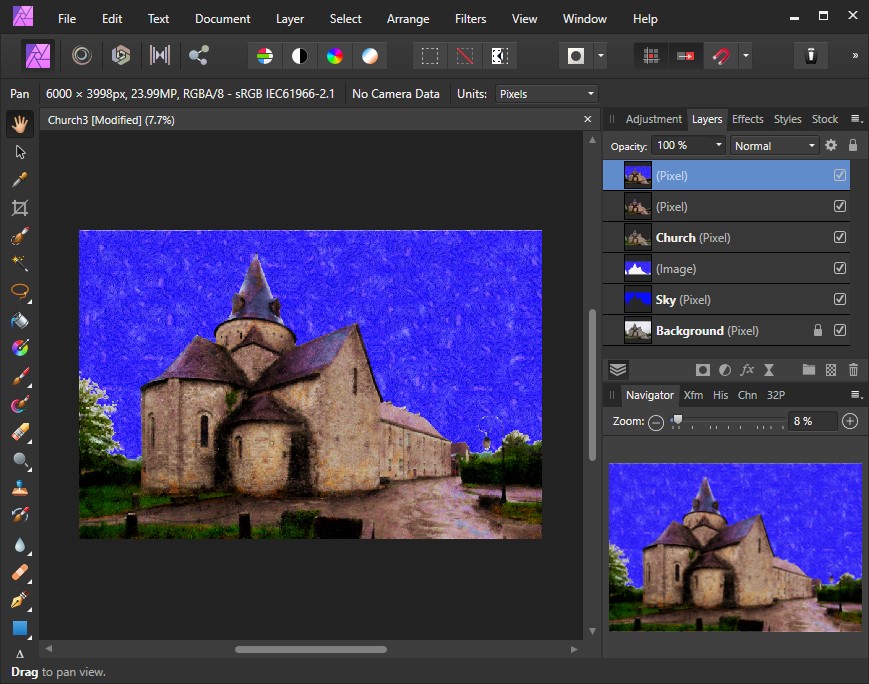
Then click to Move to Front.
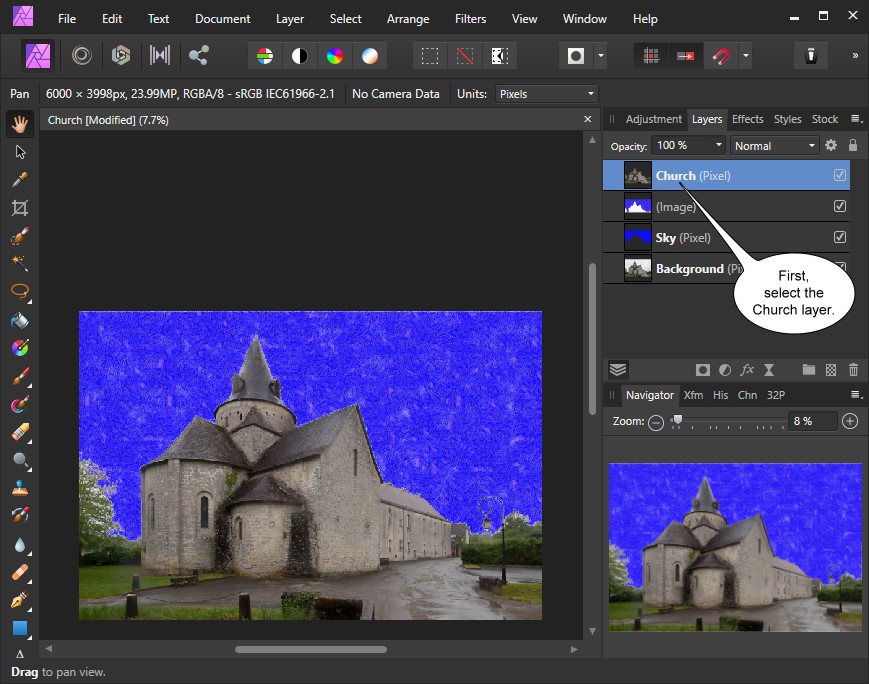
Step
14
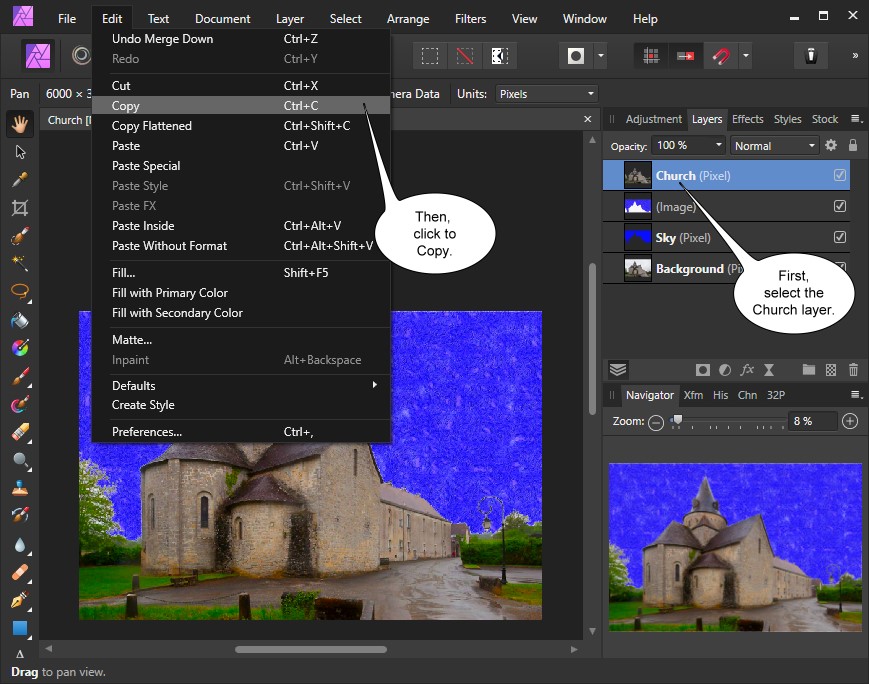
First, select the Church layer.
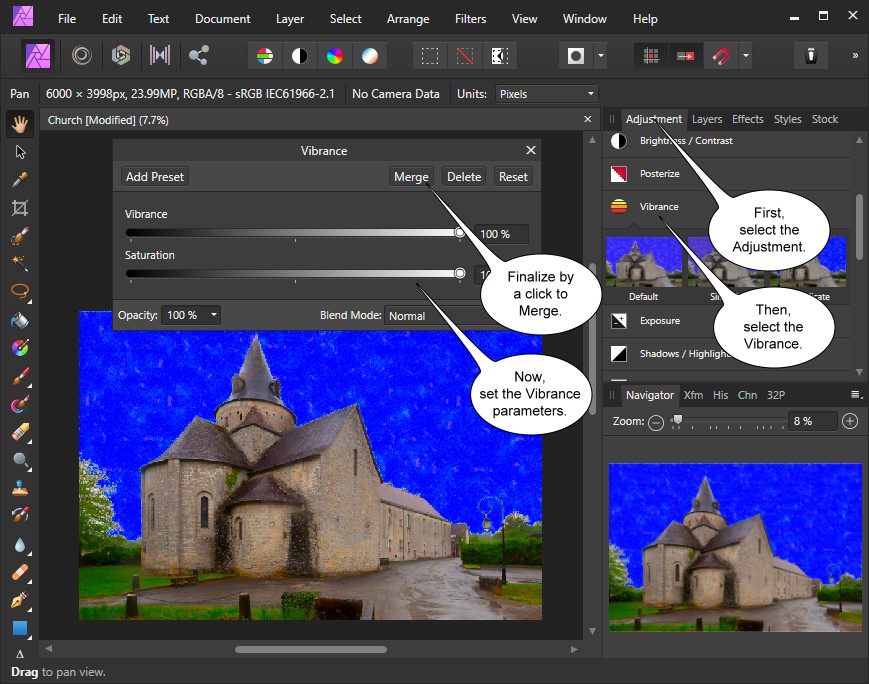
Step
15
First, select the Adjustment. Then select the Vibrance. Now,
set the Vibrance parameters. Finalize by a click to Merge.
Step
16
First, select the Church layer. Then, click to Copy.
Step
17
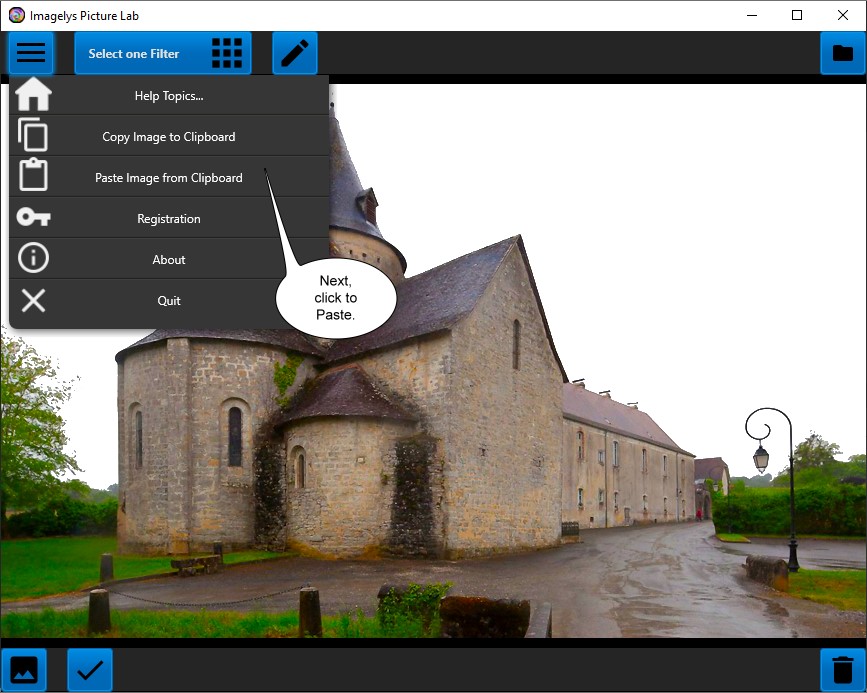
Now, open Imagelys Picture Lab and click to Paste image from
clipboard.
Step
18
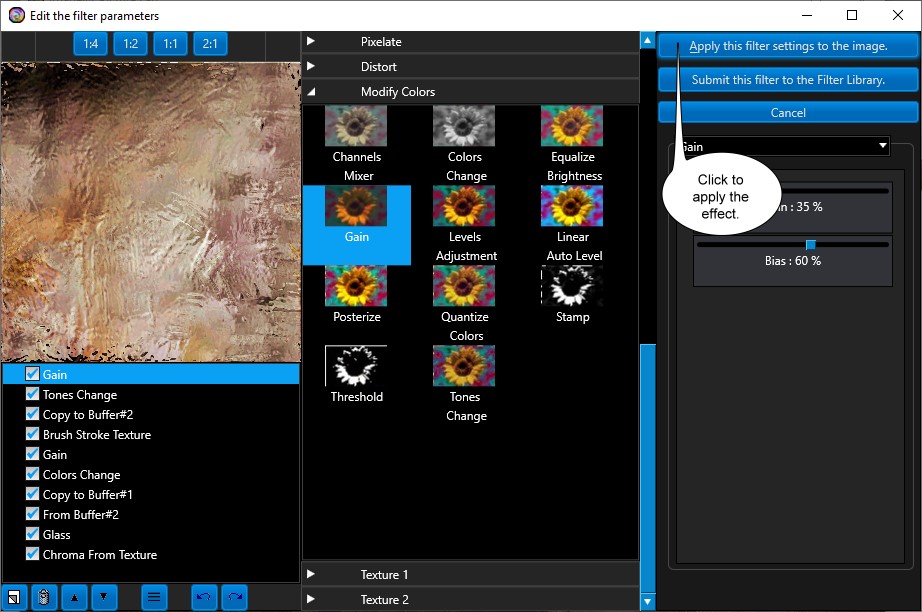
Now, in the ToolPalette, enter the filter name "Gogh FAA
09" into the search bar, then click one of the filter icons.
Step
19
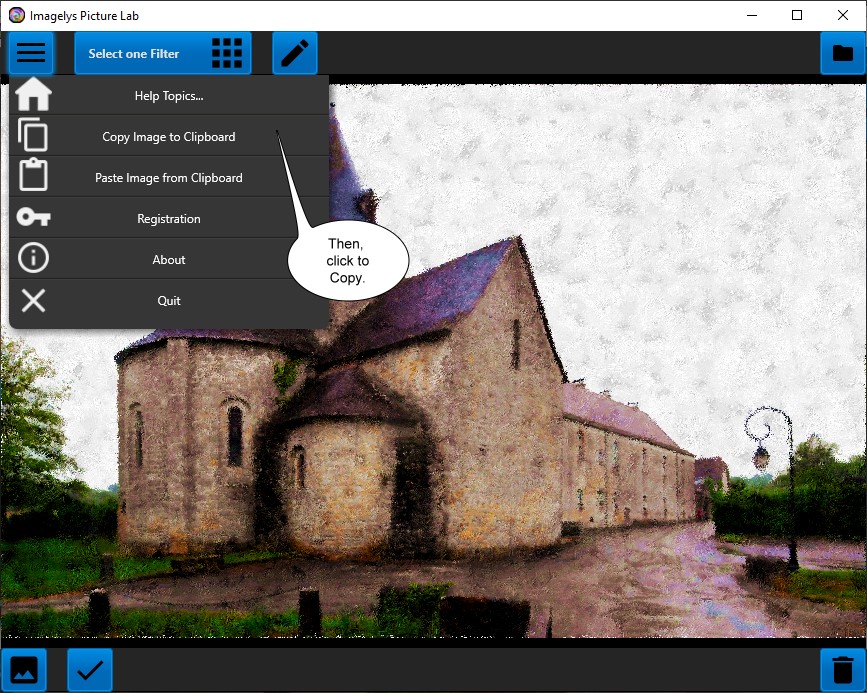
After a little while (the rightmost portion of the status bar
shows the progress), the rendered effect will be displayed.
Then, click to copy image to clipboard.
Step
20
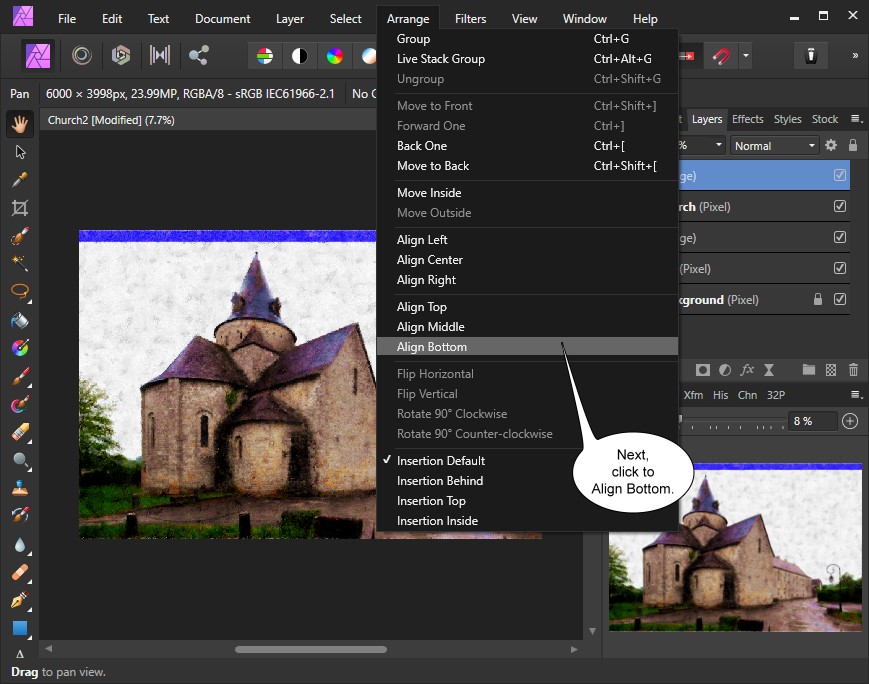
Step
21
Next, click to Align Bottom.
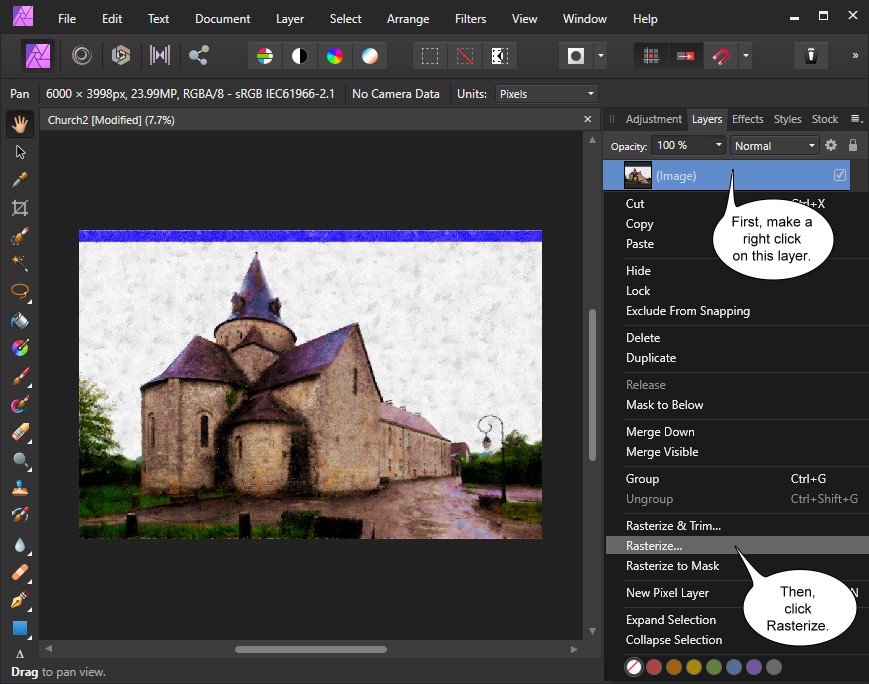
Step
22
First, make a right click on this layer. Then, click to Rasterize.
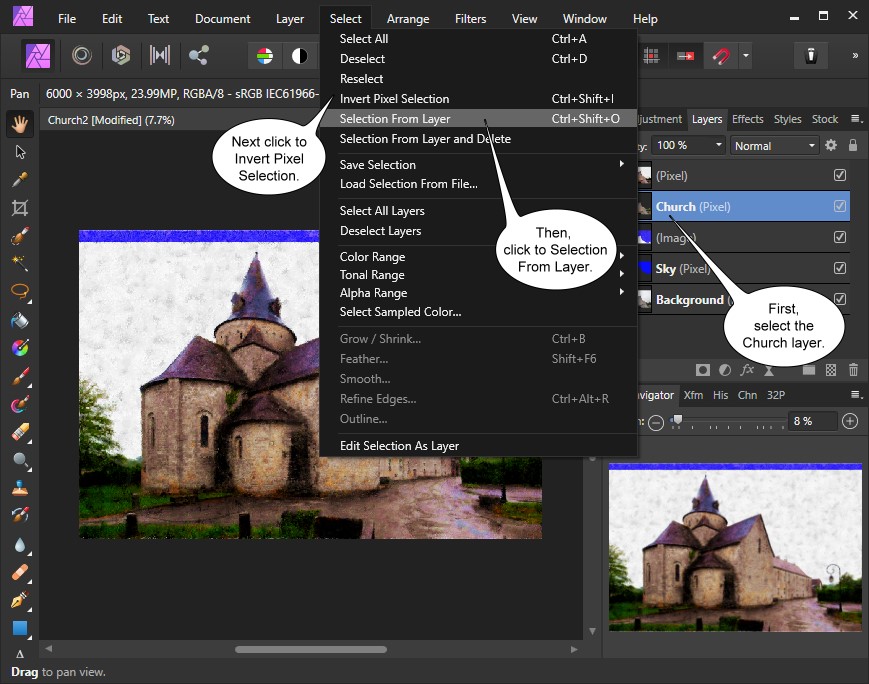
Step
23
First, select the Church layer. Then click to Selection From
Layer. Next, click to Invert Pixel Selection.
Step
24
First, select this layer. Then, click to Cut.
Step
25
Now, click to Save as in the main menu and enter a filename..
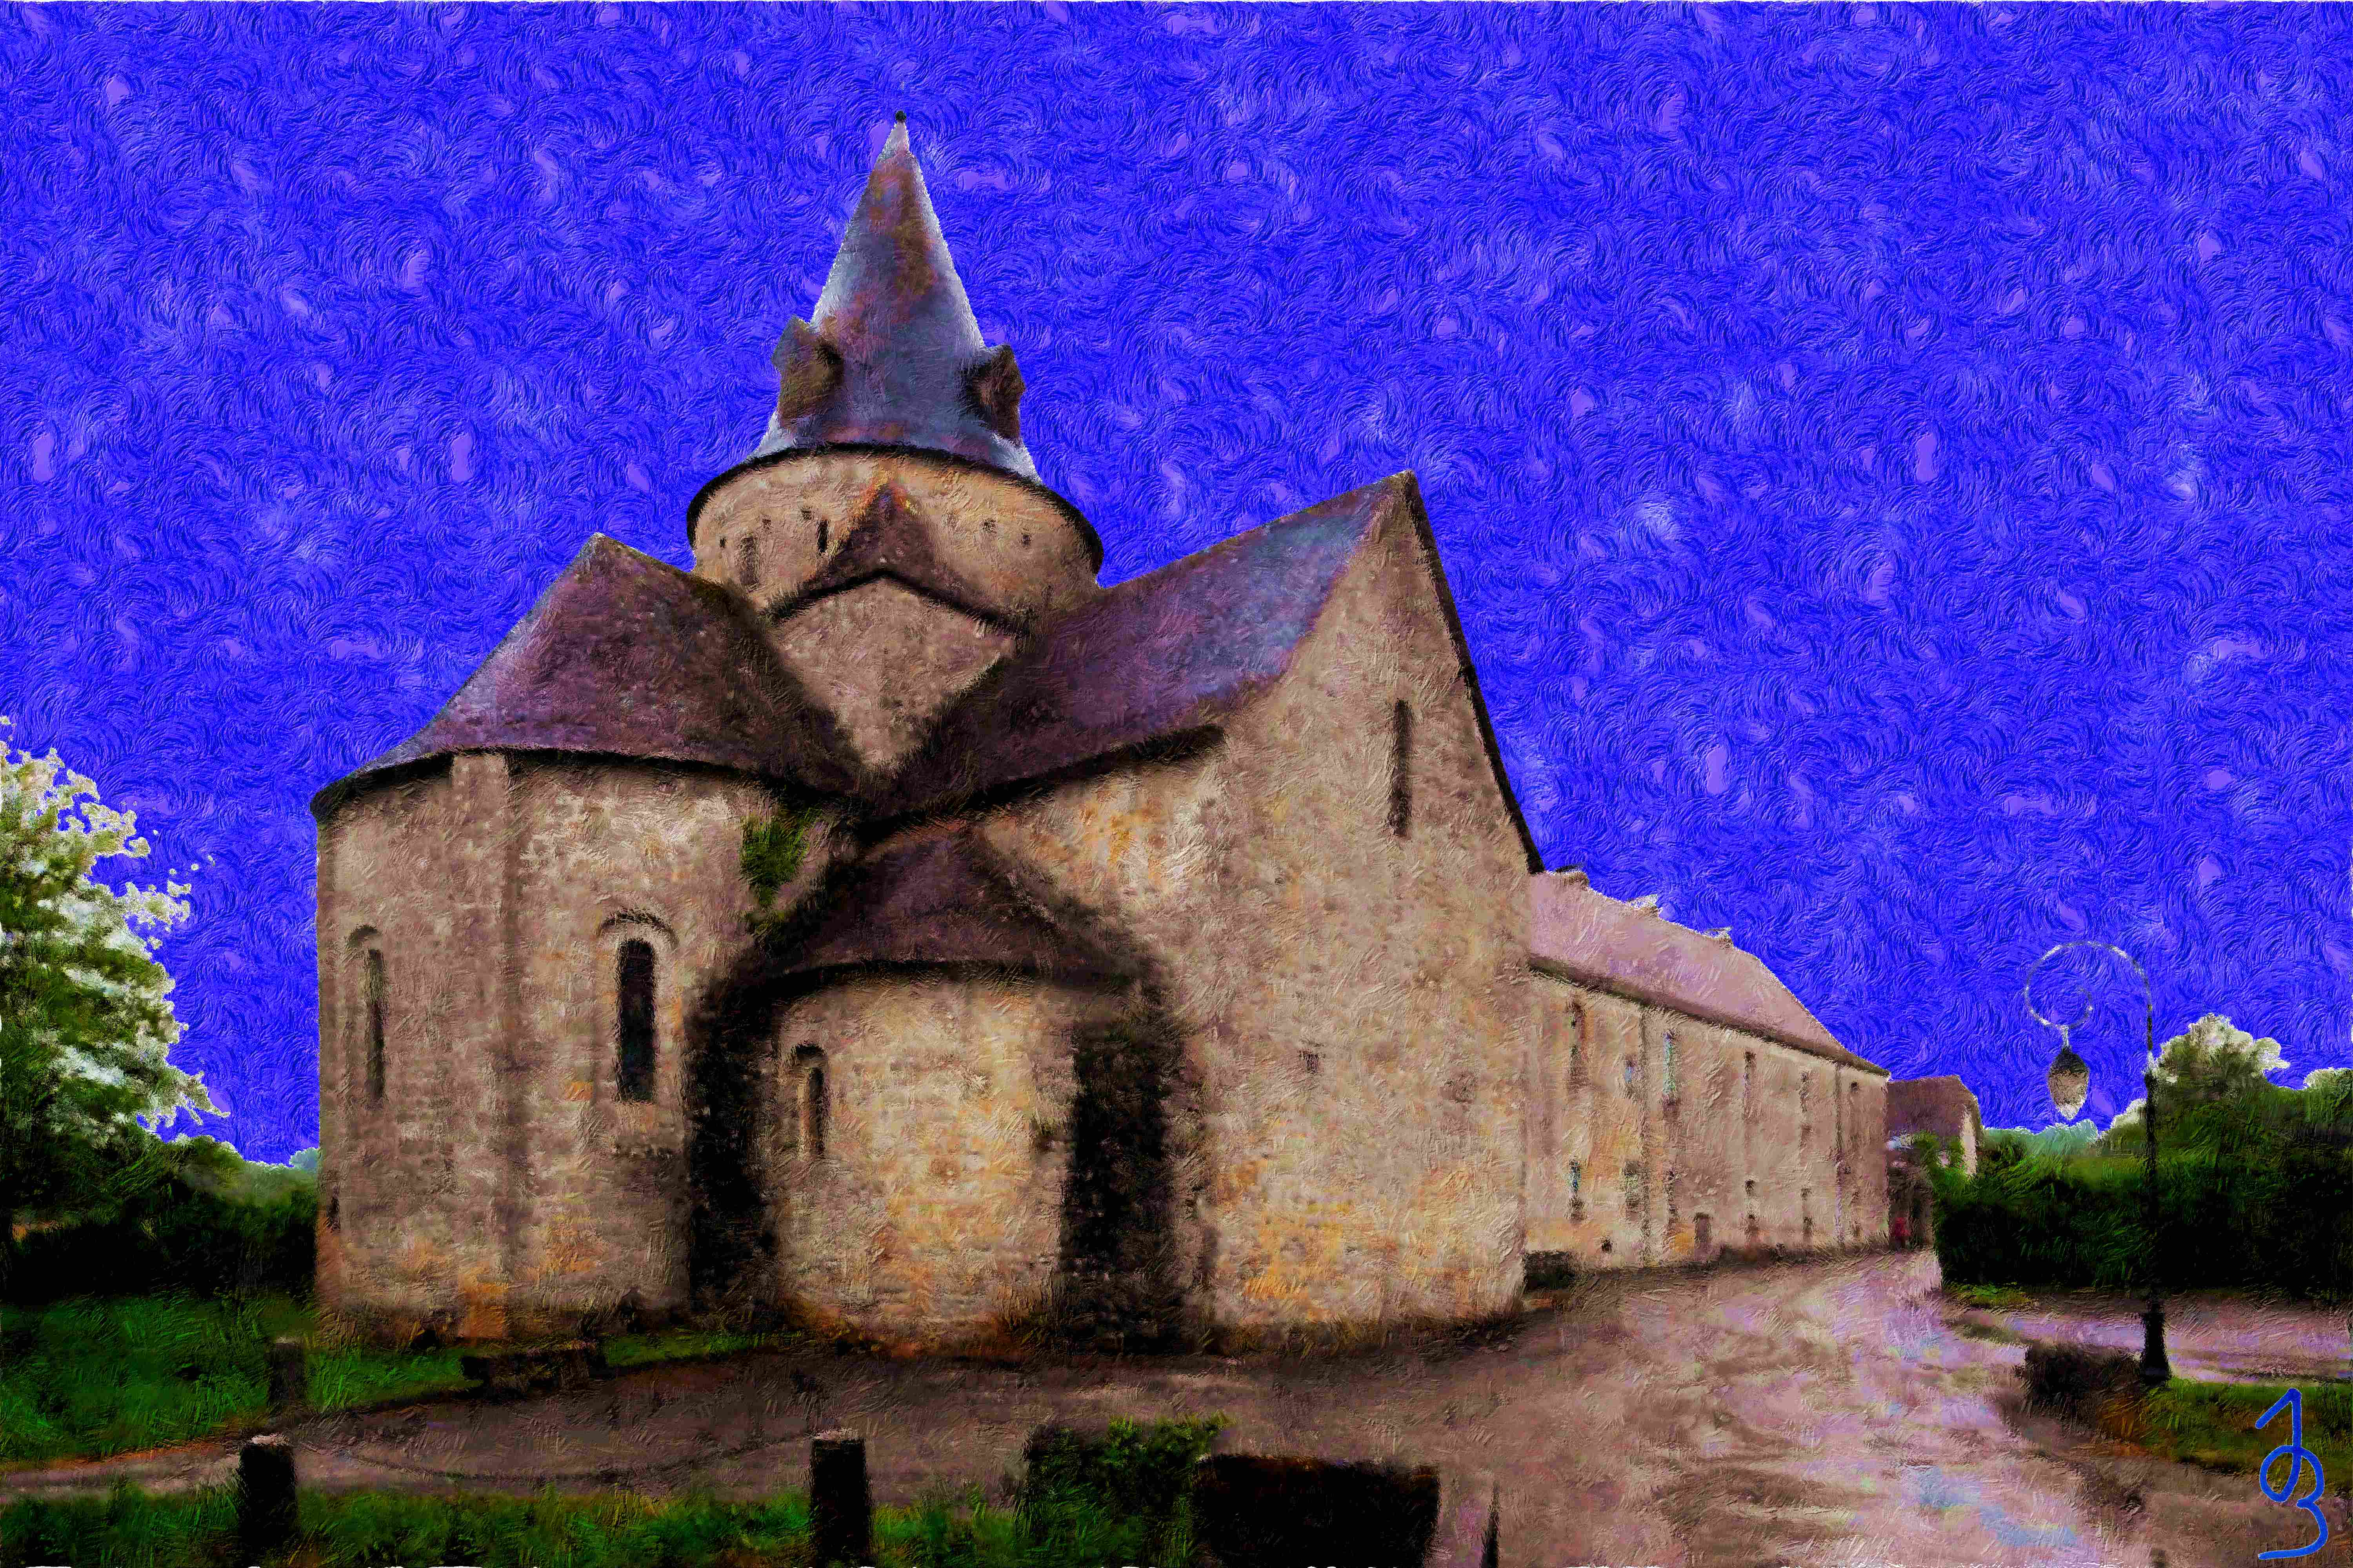
The result of Brush Strokes effects inspired by Vincent Van
Gogh.
Click on this image to zoom.
|