Apply
amazing Bokeh effect to your images files with Affinity Photo
3
|
Previous
Top
|
First, read this tutorial
if you haven't installed the Imagelys Plugin for Affinity Photo.
You can apply Bokeh effect to your images files very easily
with Affinity Photo 3. For PC.
 Step 1 Step 1
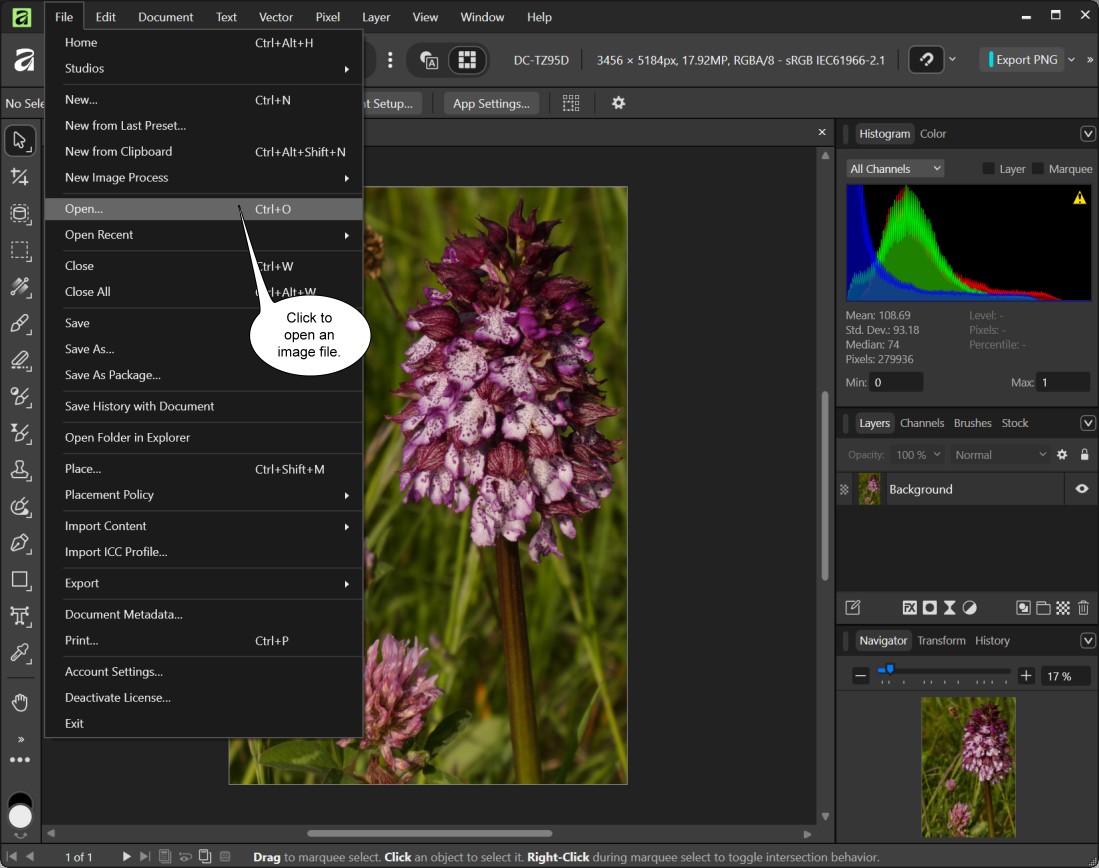
With Affinity in Pixel Mode, in the main menu, click
to open and choose an image file.
Step 2
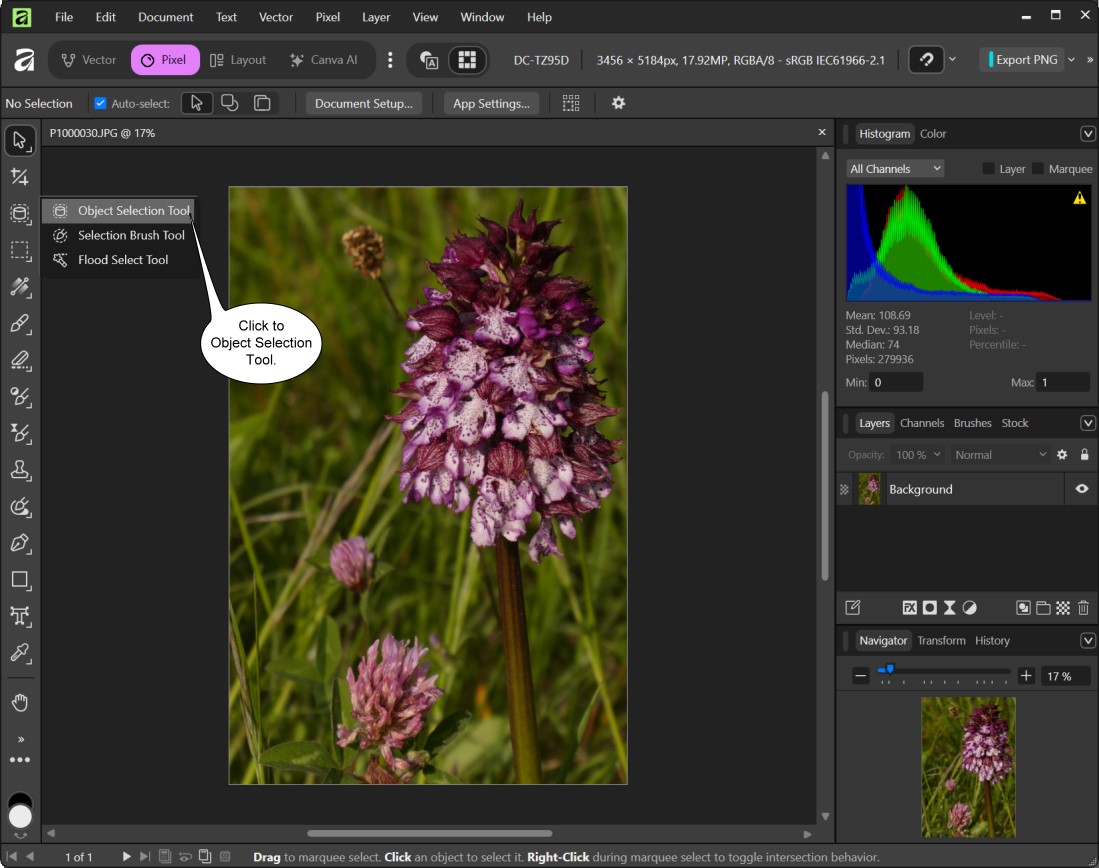
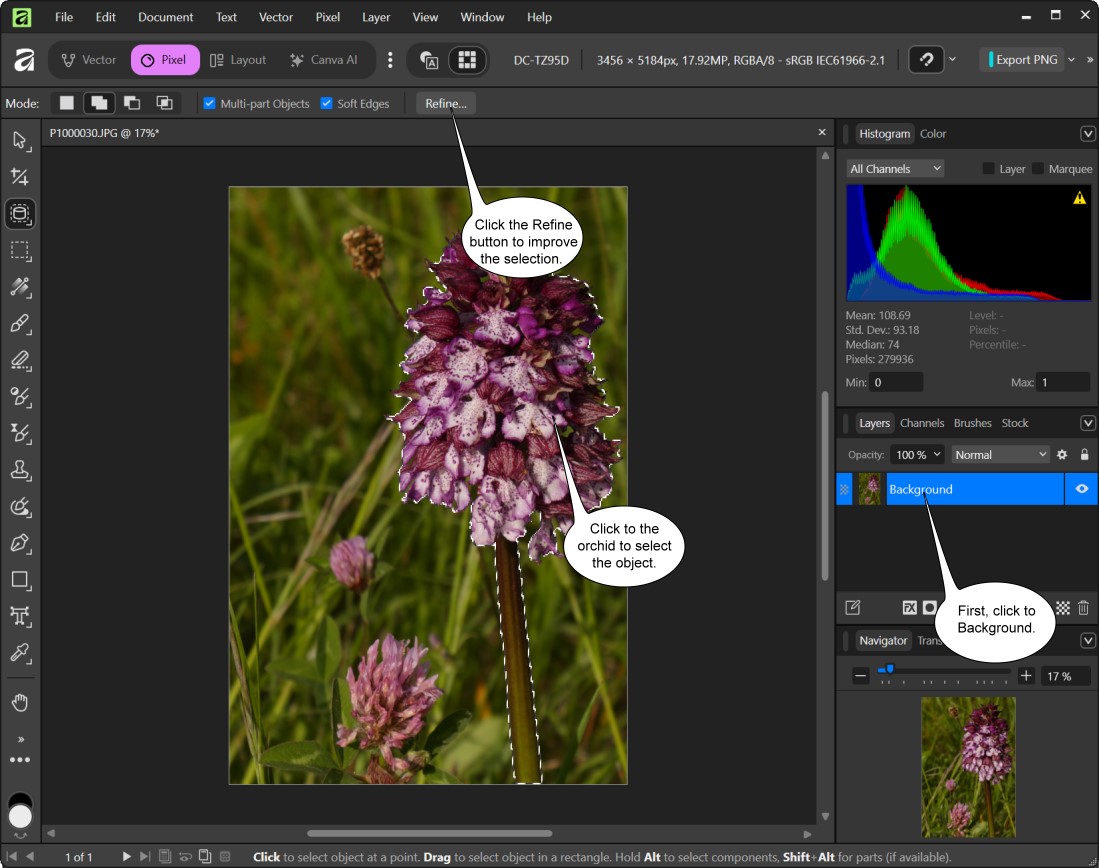
First, select the Background. Then, click to Object Selection
Tool. Wait for Affinity to finish analyzing the image, then
click on the orchid.
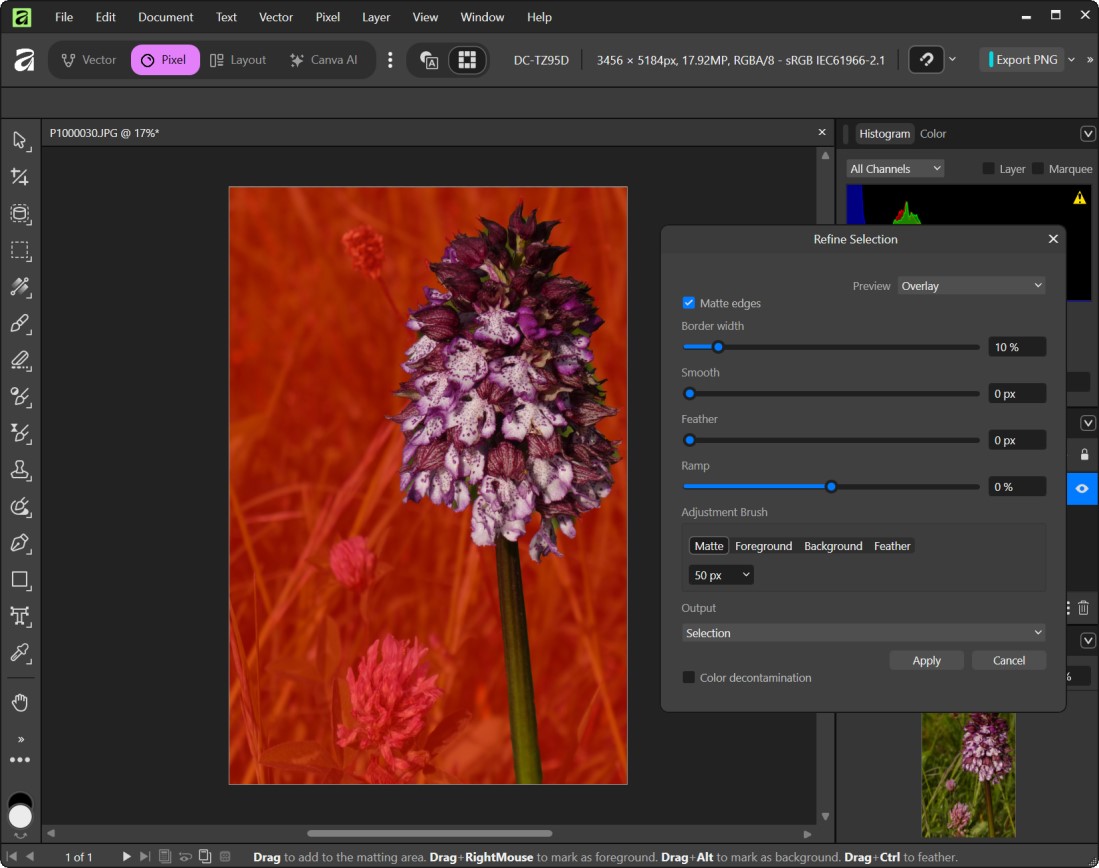
You can click the Refine button to improve the selection.
Step 3
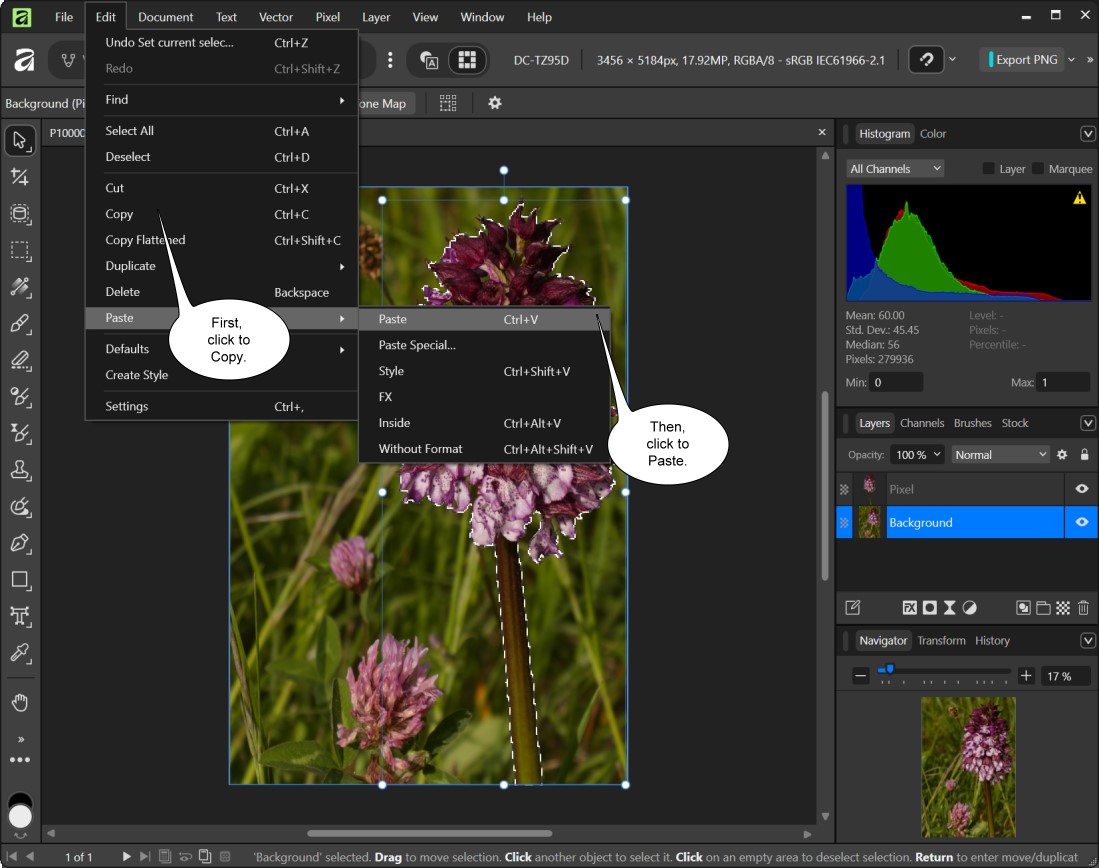
First, click to Copy, then click to Paste.
Step
4
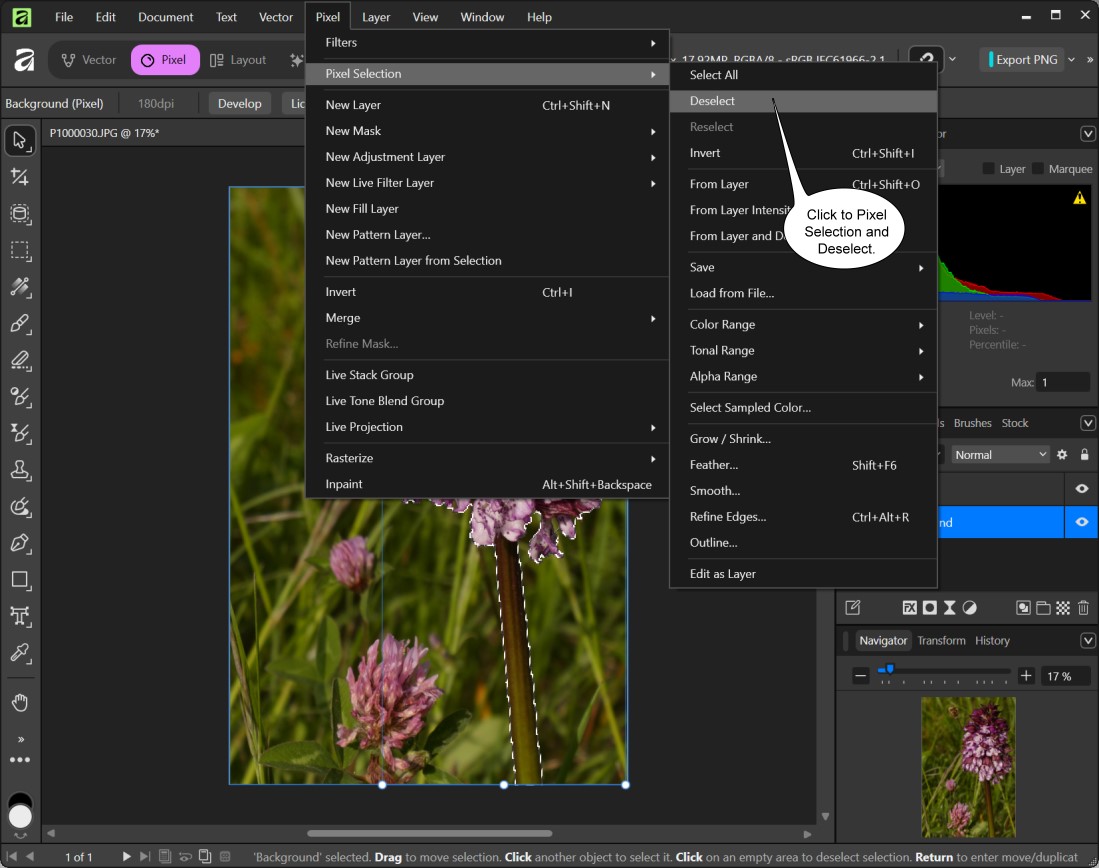
Now, click to Pixel Selection and Deselect.
Step
5
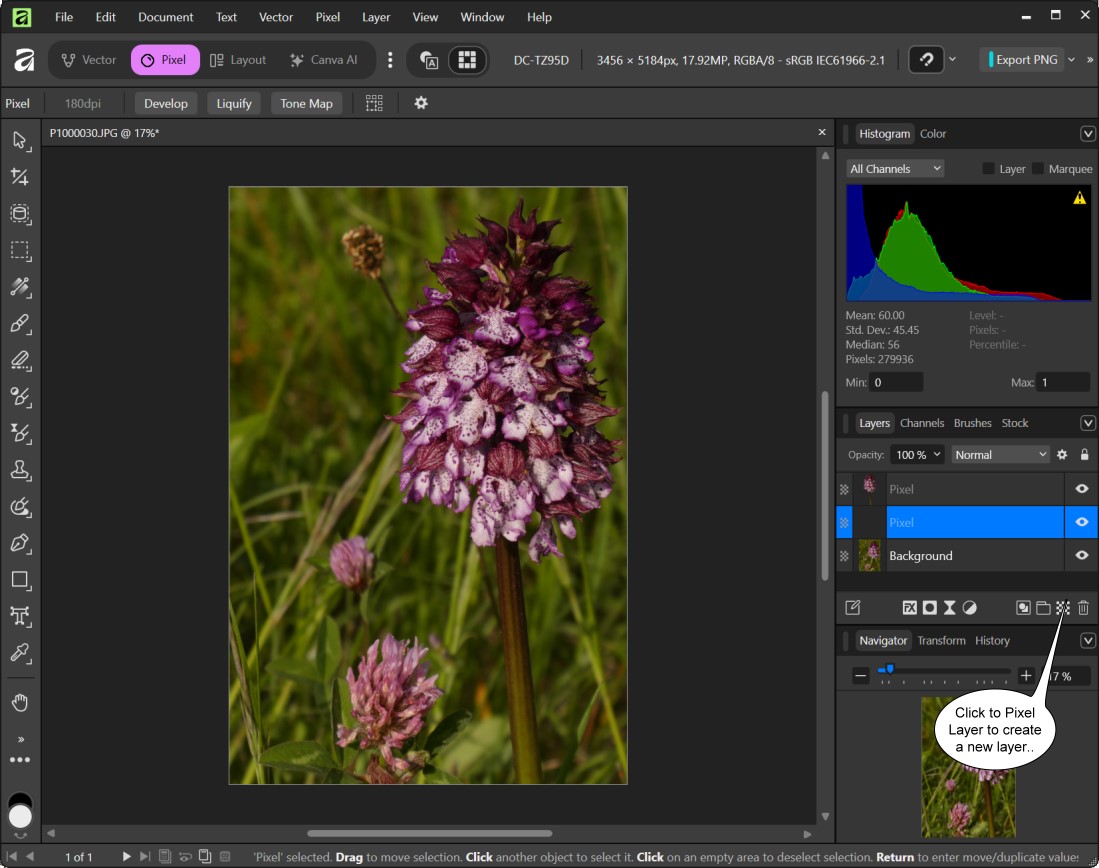
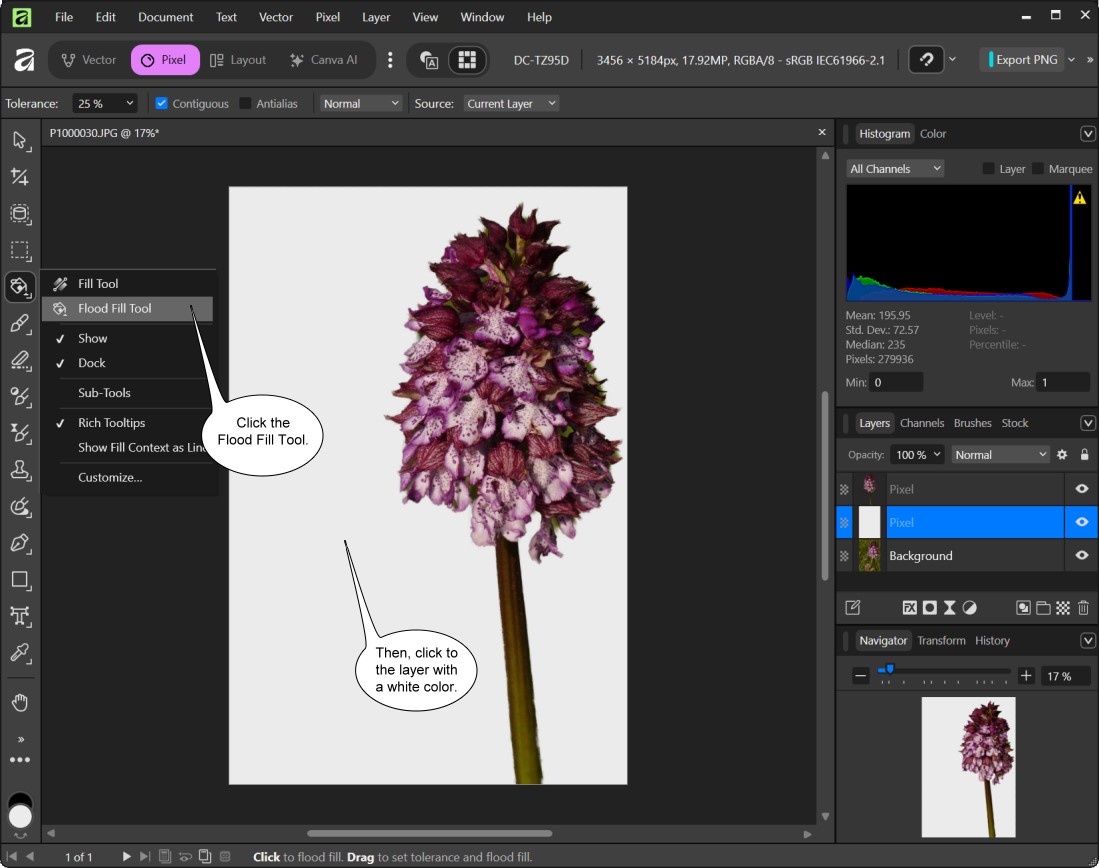
Now, click to Pixel Layer to create a new layer. Then, click
to the Flood Fill Tool. Now, click to the layer with a white
color.
Step
6
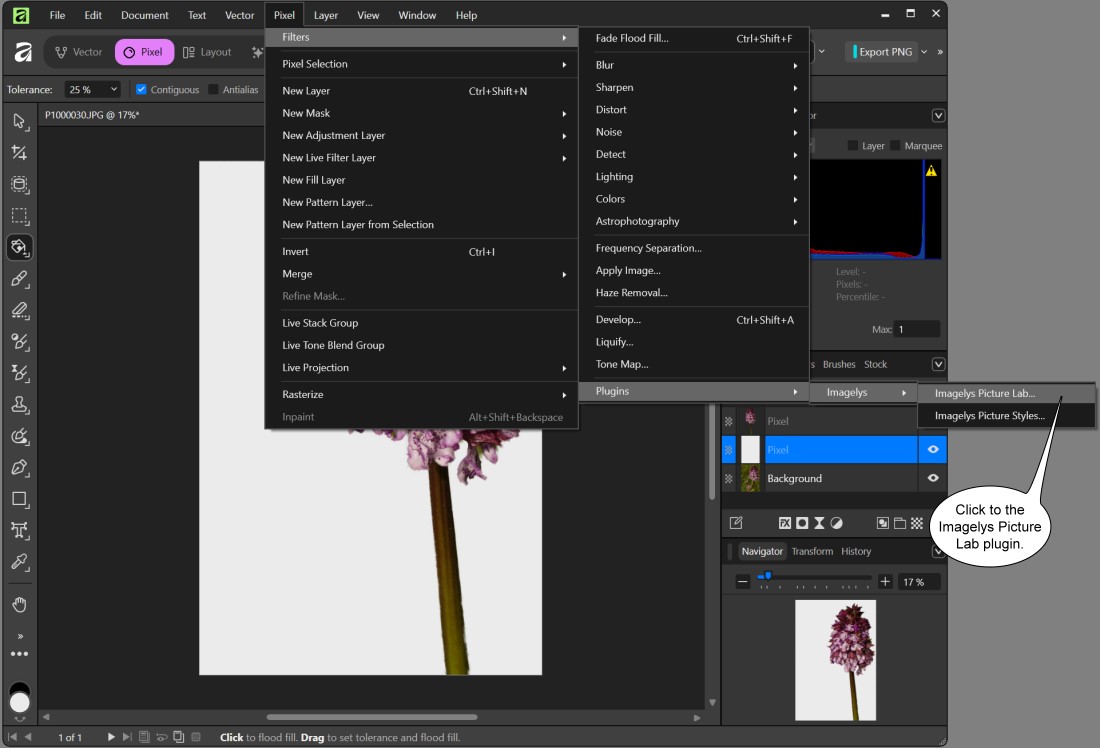
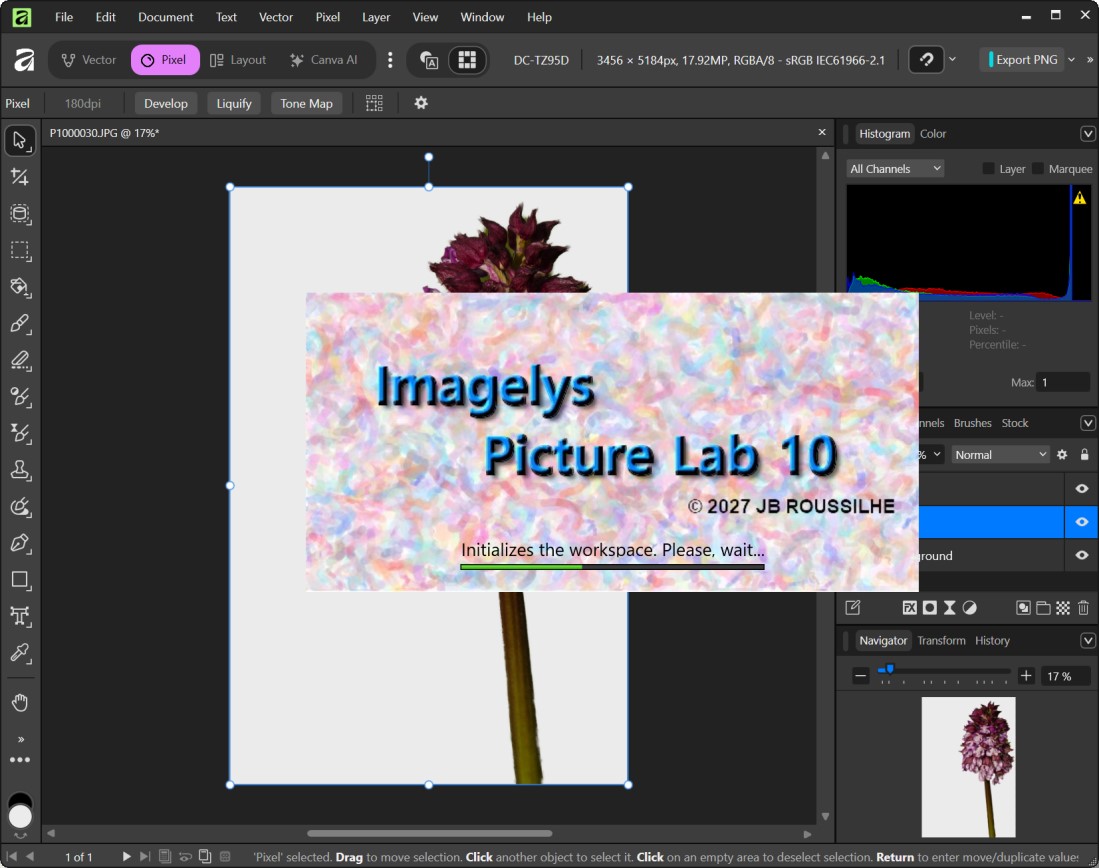
Then, into the Pixel menu, click to Filters -> Plugins -
> Imagelys -> Imagelys Picture Lab.
Step
7
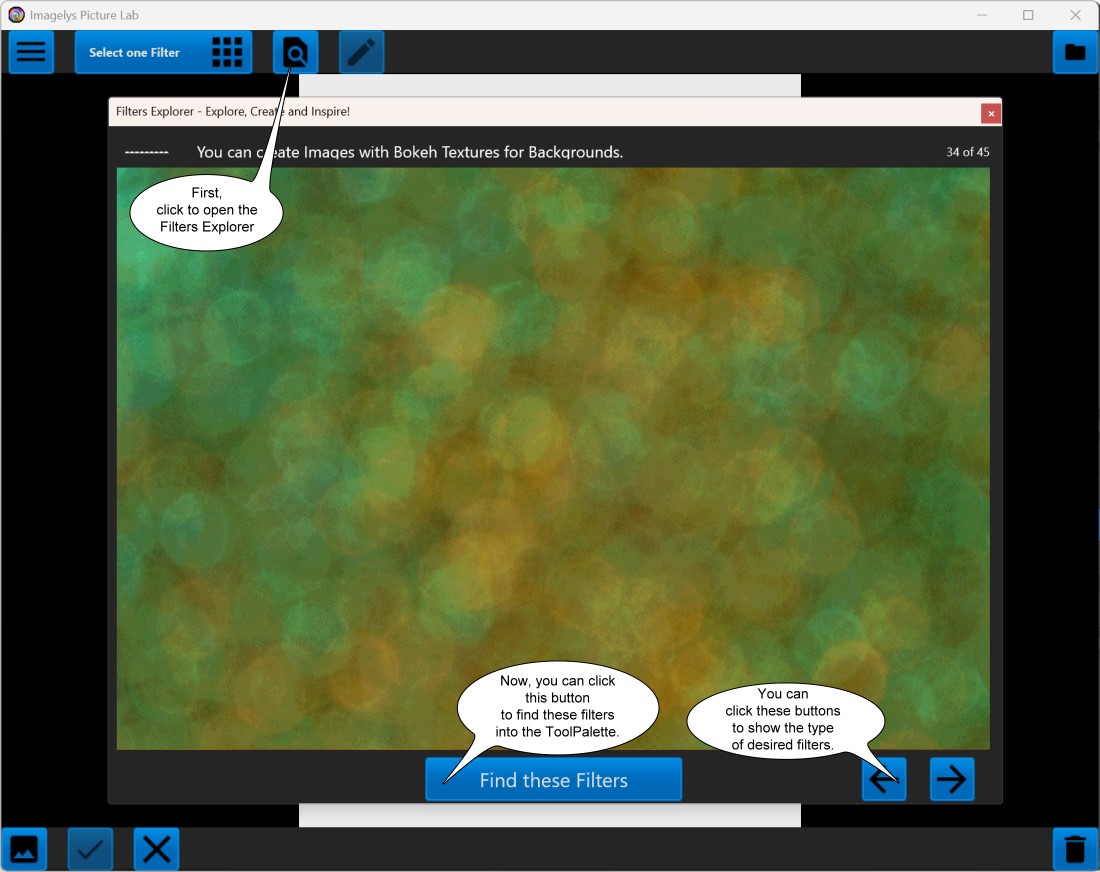
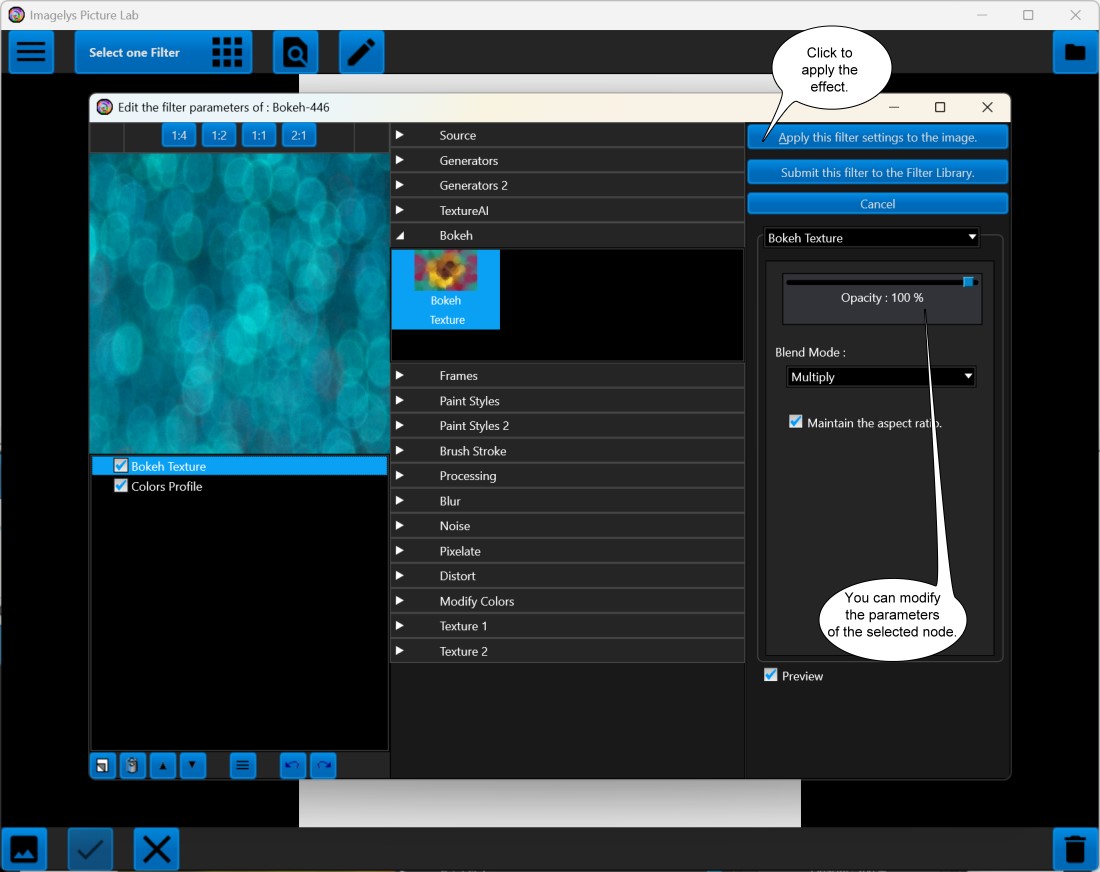
First, In the main toolbar, click to open the Filters Explorer.
You can click these arrow buttons to show the type of desired
filters. For now, use the Bokeh Textures.
Now, you can click the button to find these filters into the
ToolPalette.
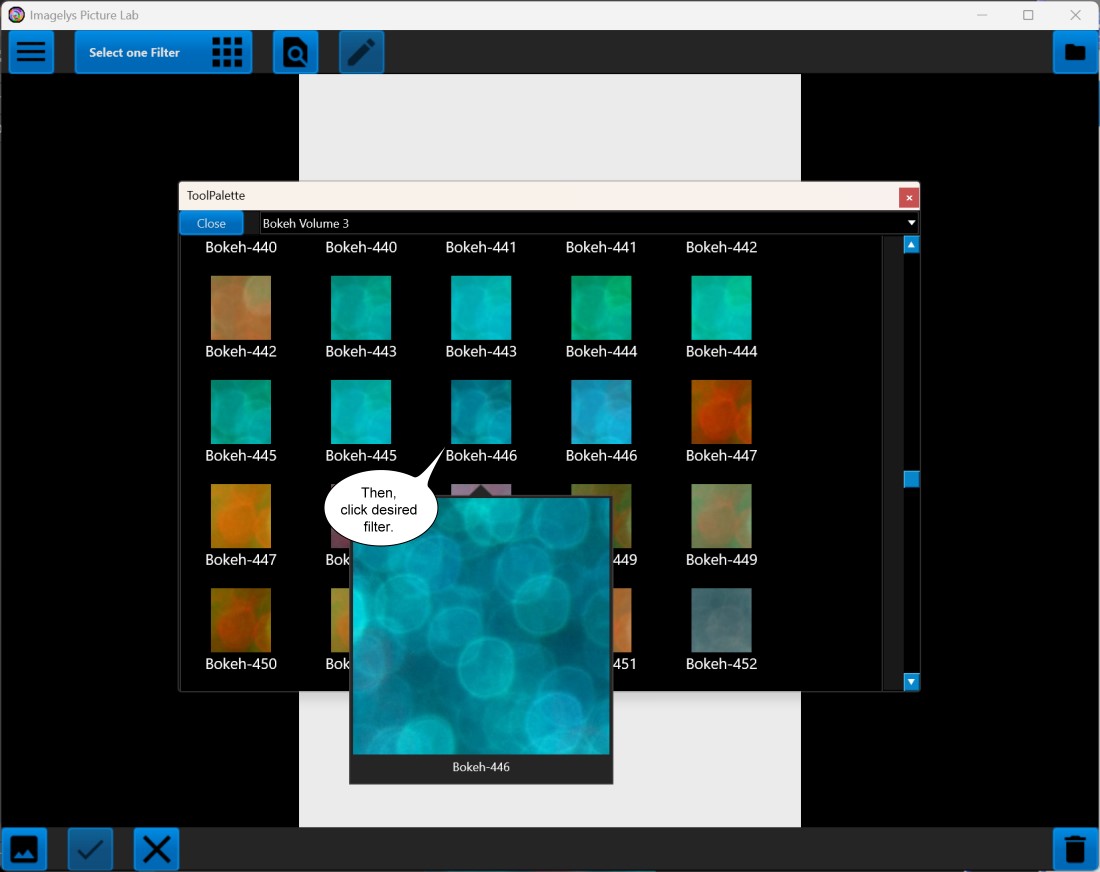
Now, in the ToolPalette, click of the filter icons of Bokeh-446.
You can modify the Bokeh settings.
Step
8
If you have not already done, the software will ask you to
download this Bokeh Texture.
Then, click to Apply the effect to the image.
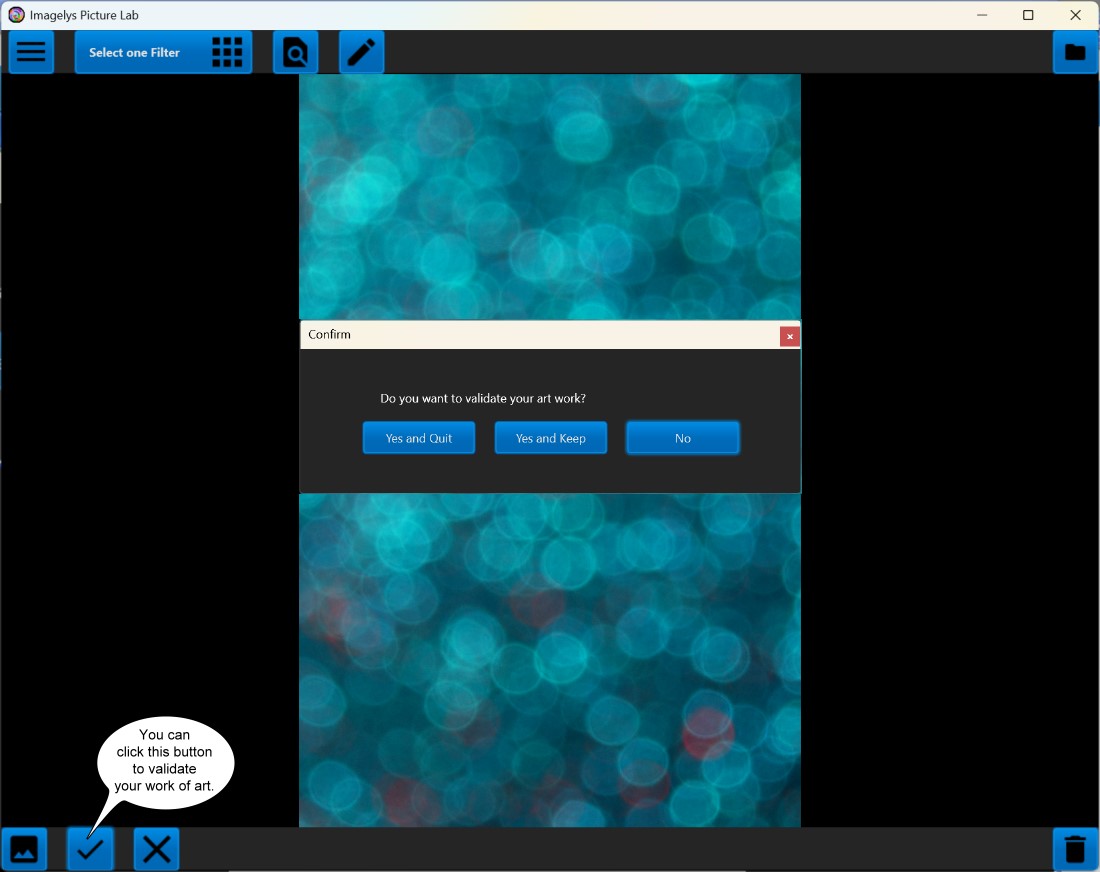
After a little while (the rightmost portion of the status bar
shows the progress), the rendered effect will be displayed.
Now, you can click the Validate button for validate your work
and return to Affinity Photo. (Click to Yes and Quit)
Step
9
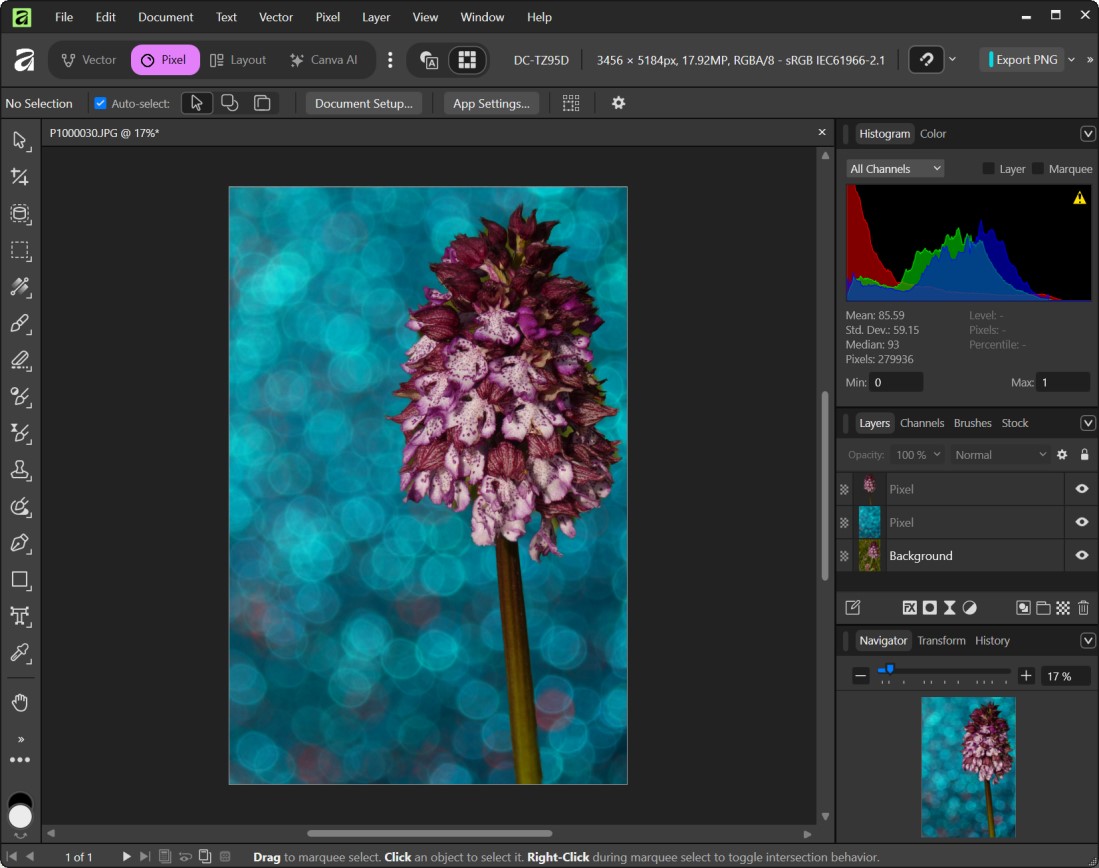
In Affinity, resize and place the orchid correctly.
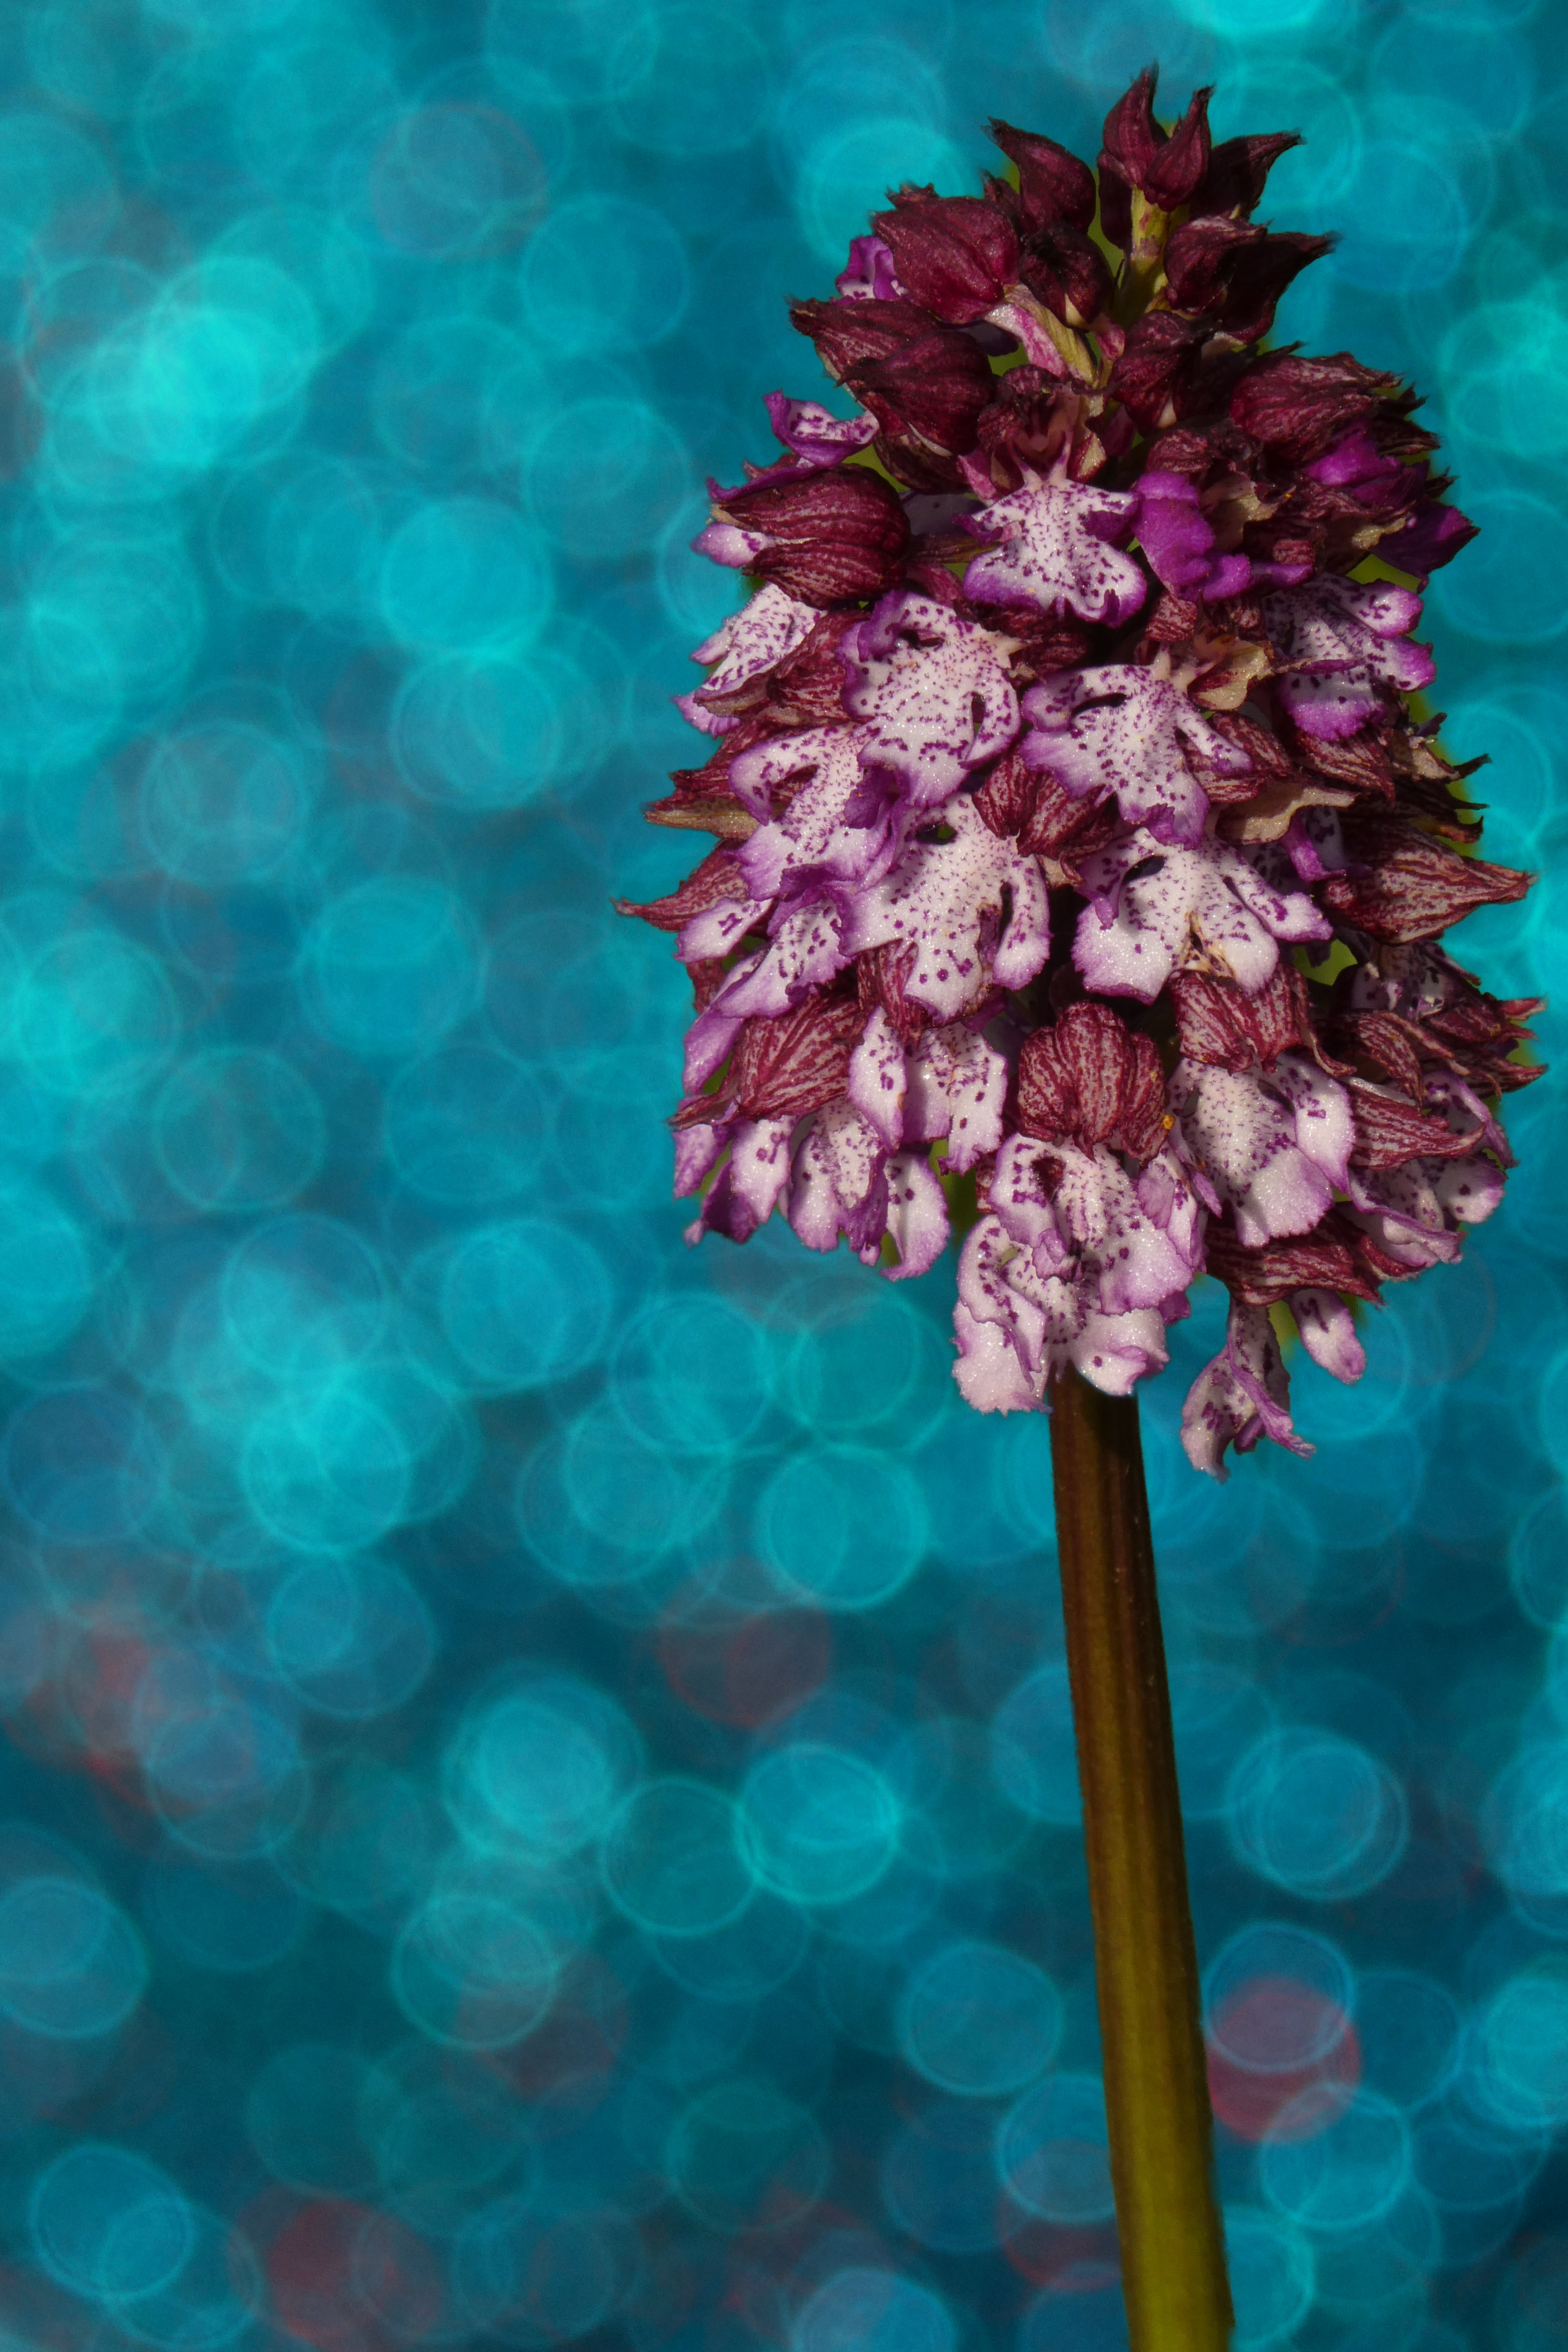
The result of Bokeh effect.
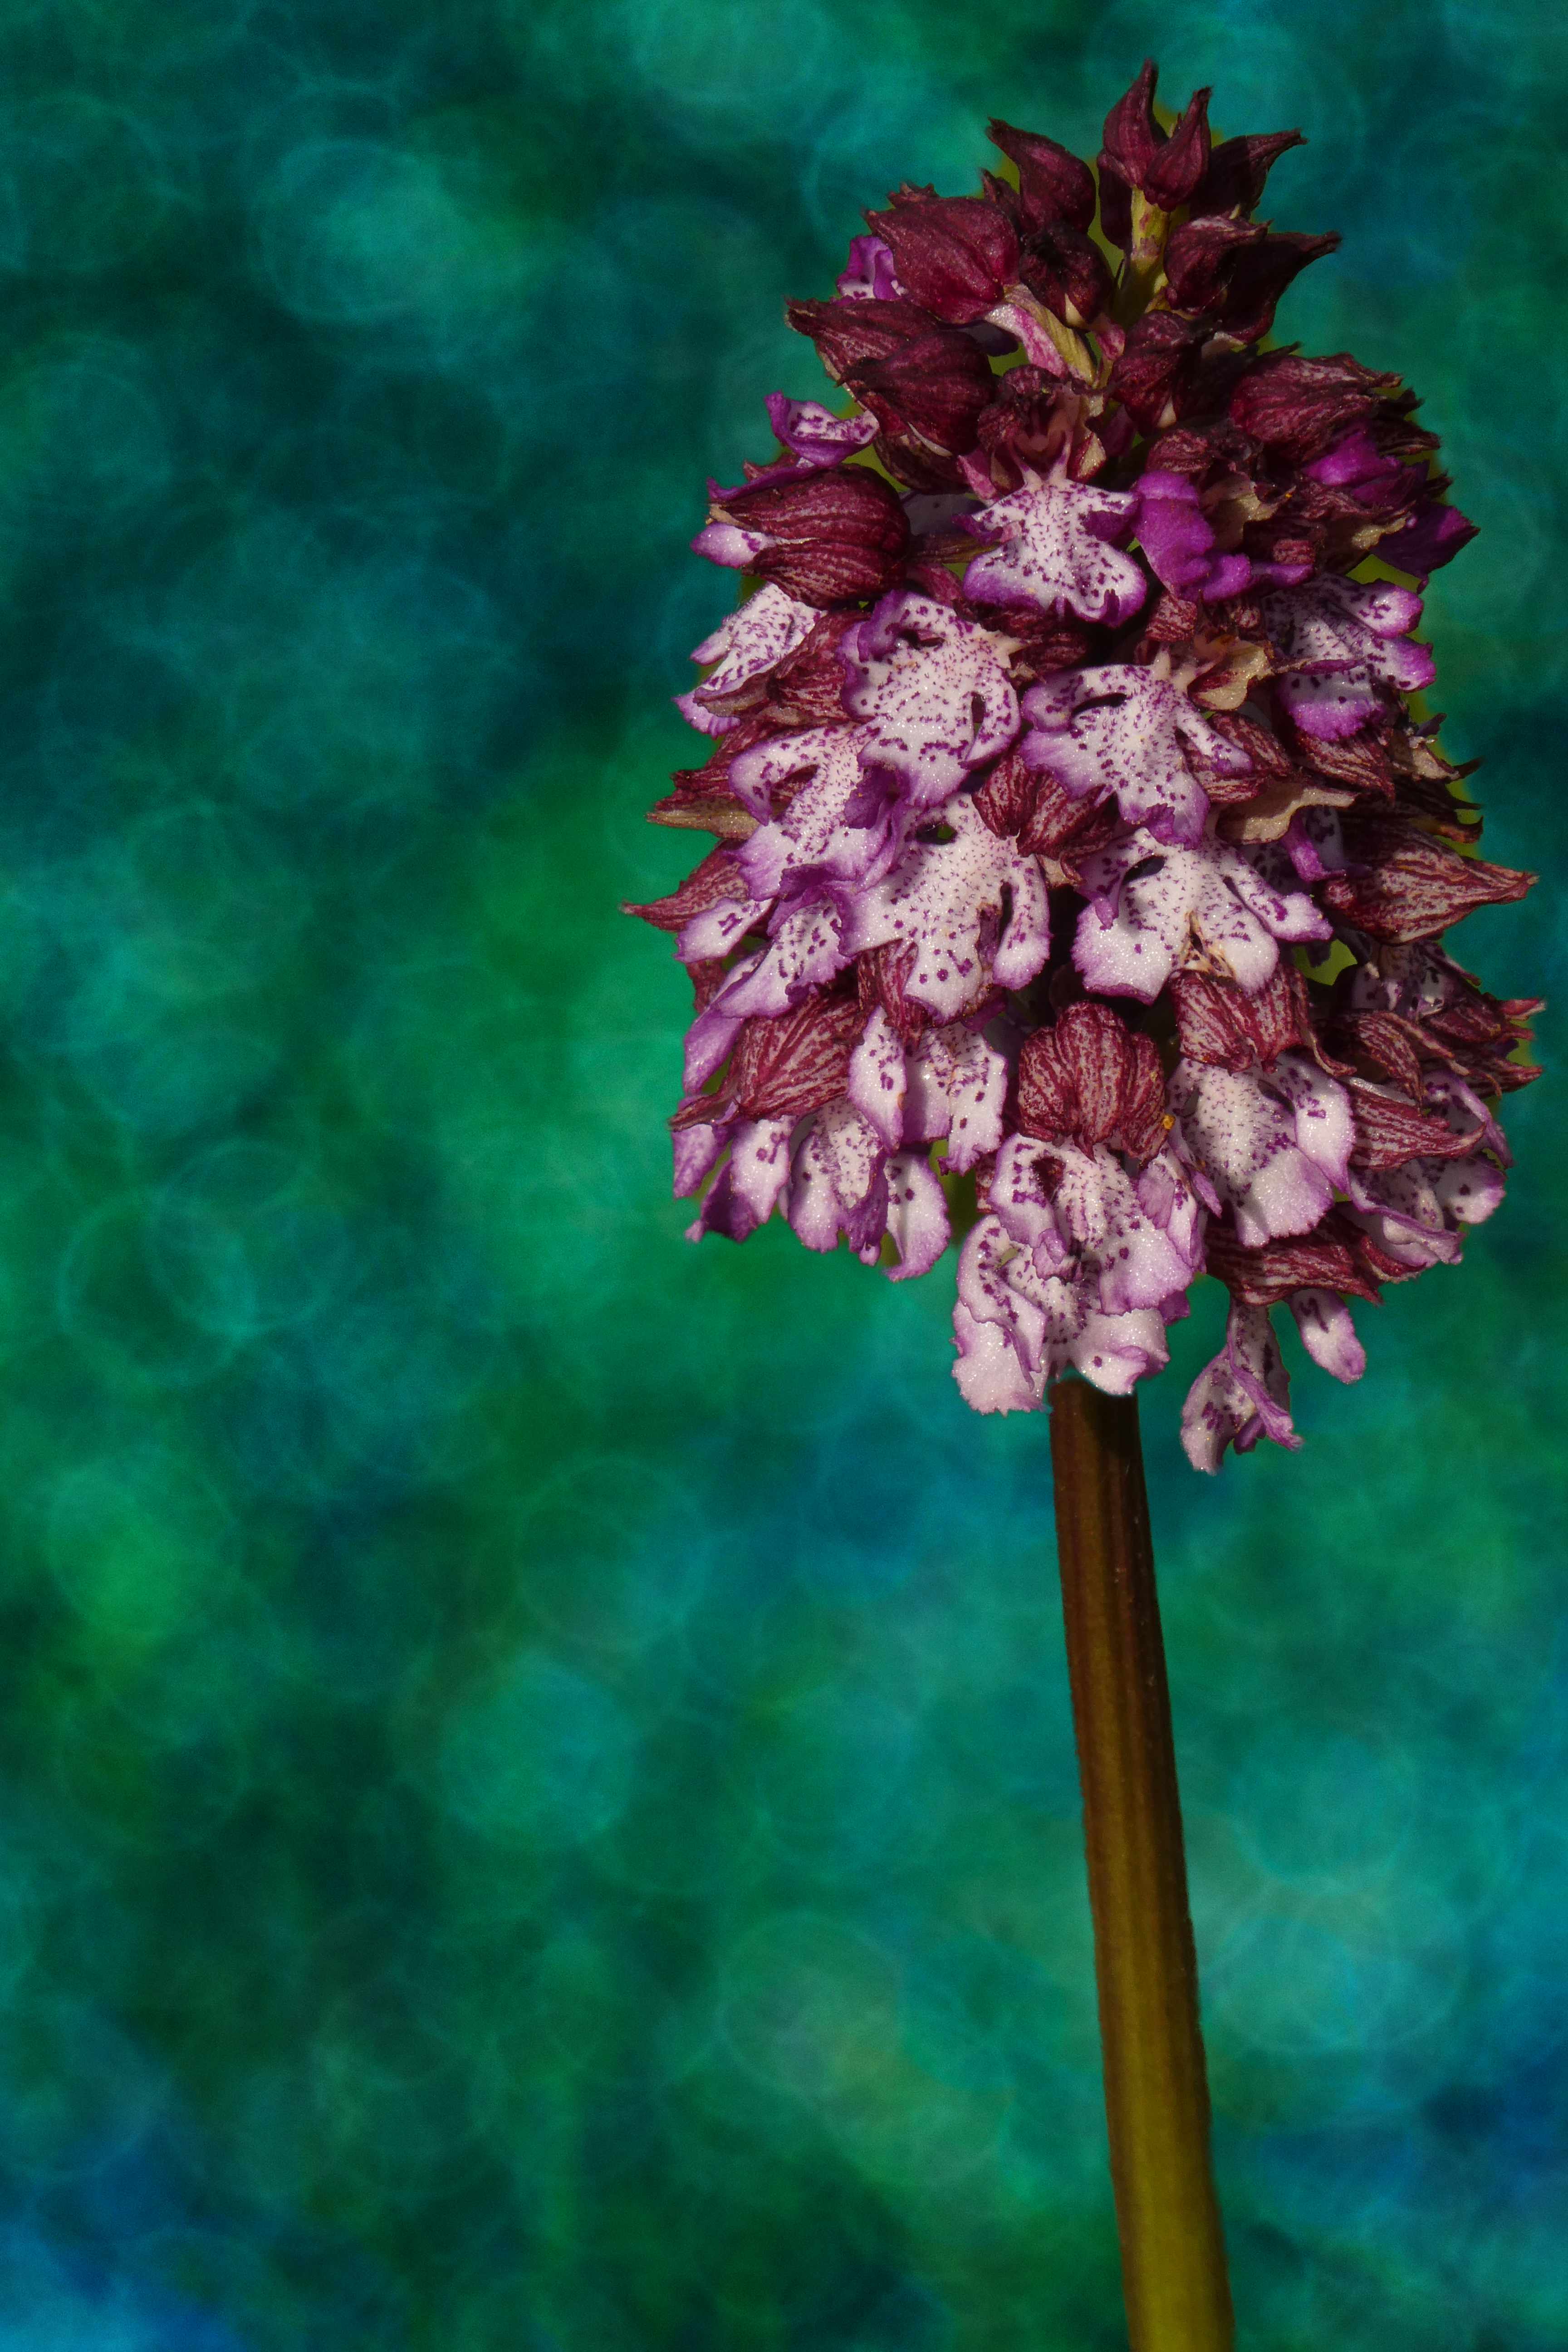
Another example of Bokeh effect.
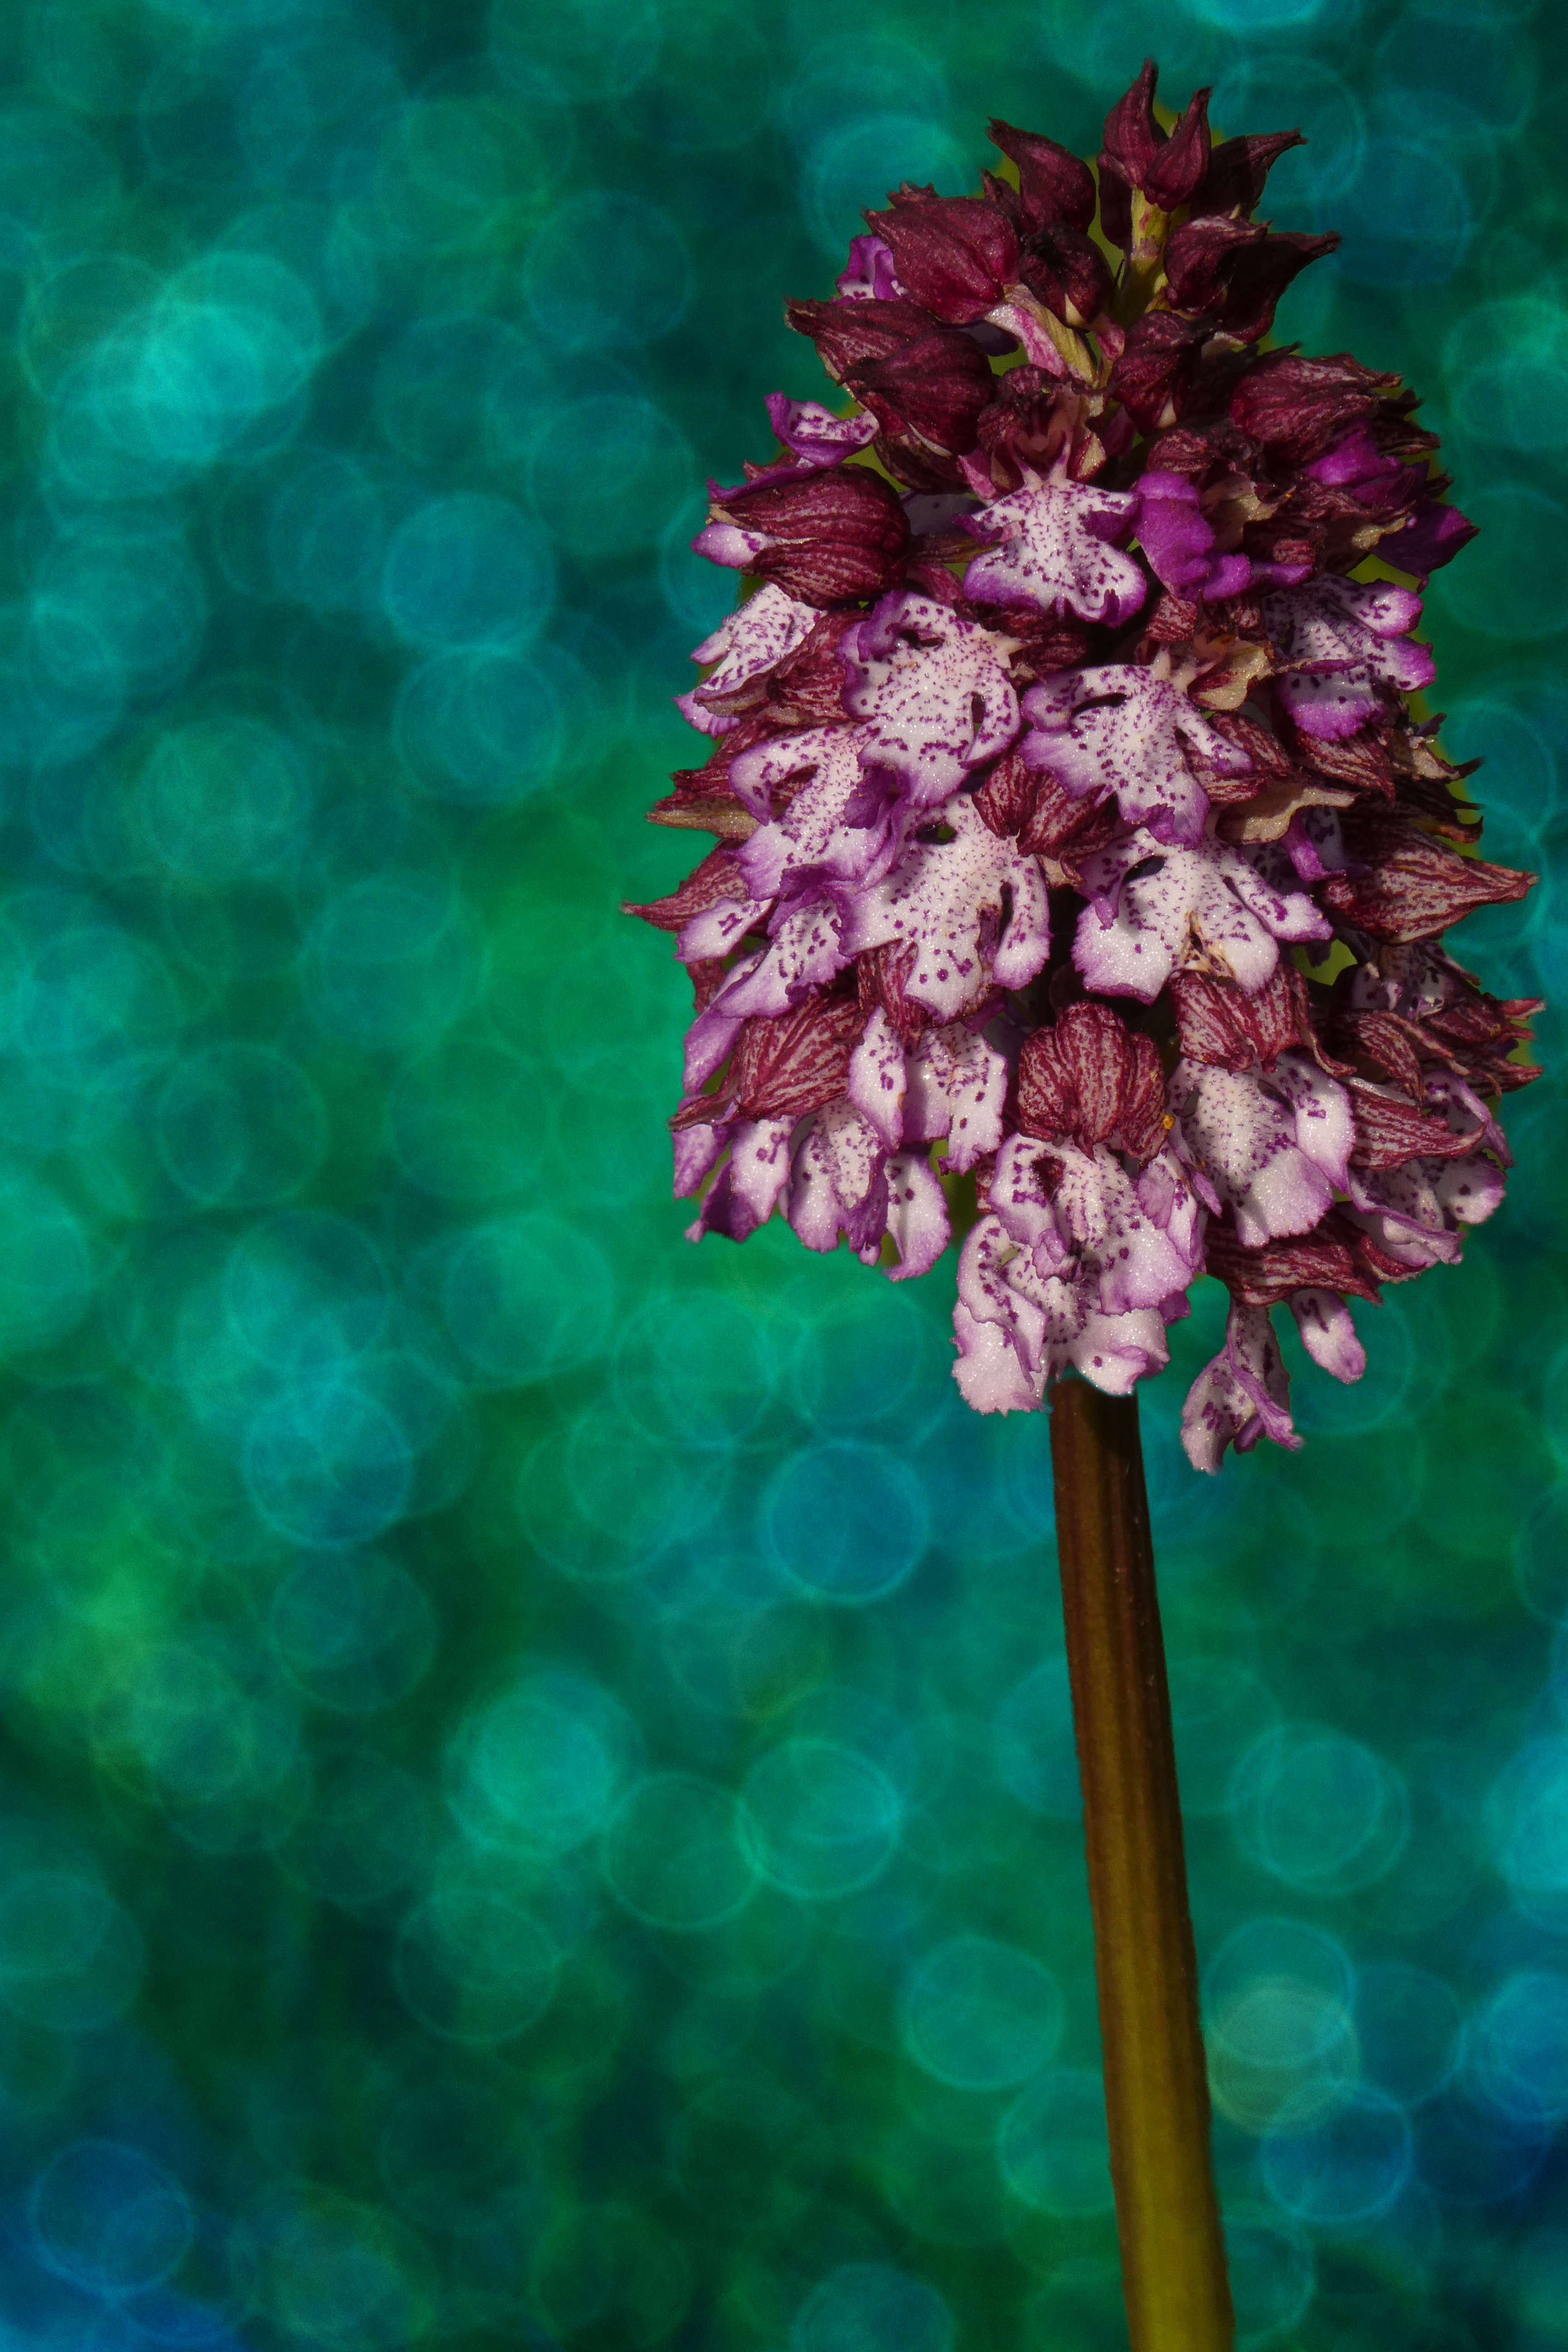
Another example of Bokeh effect.
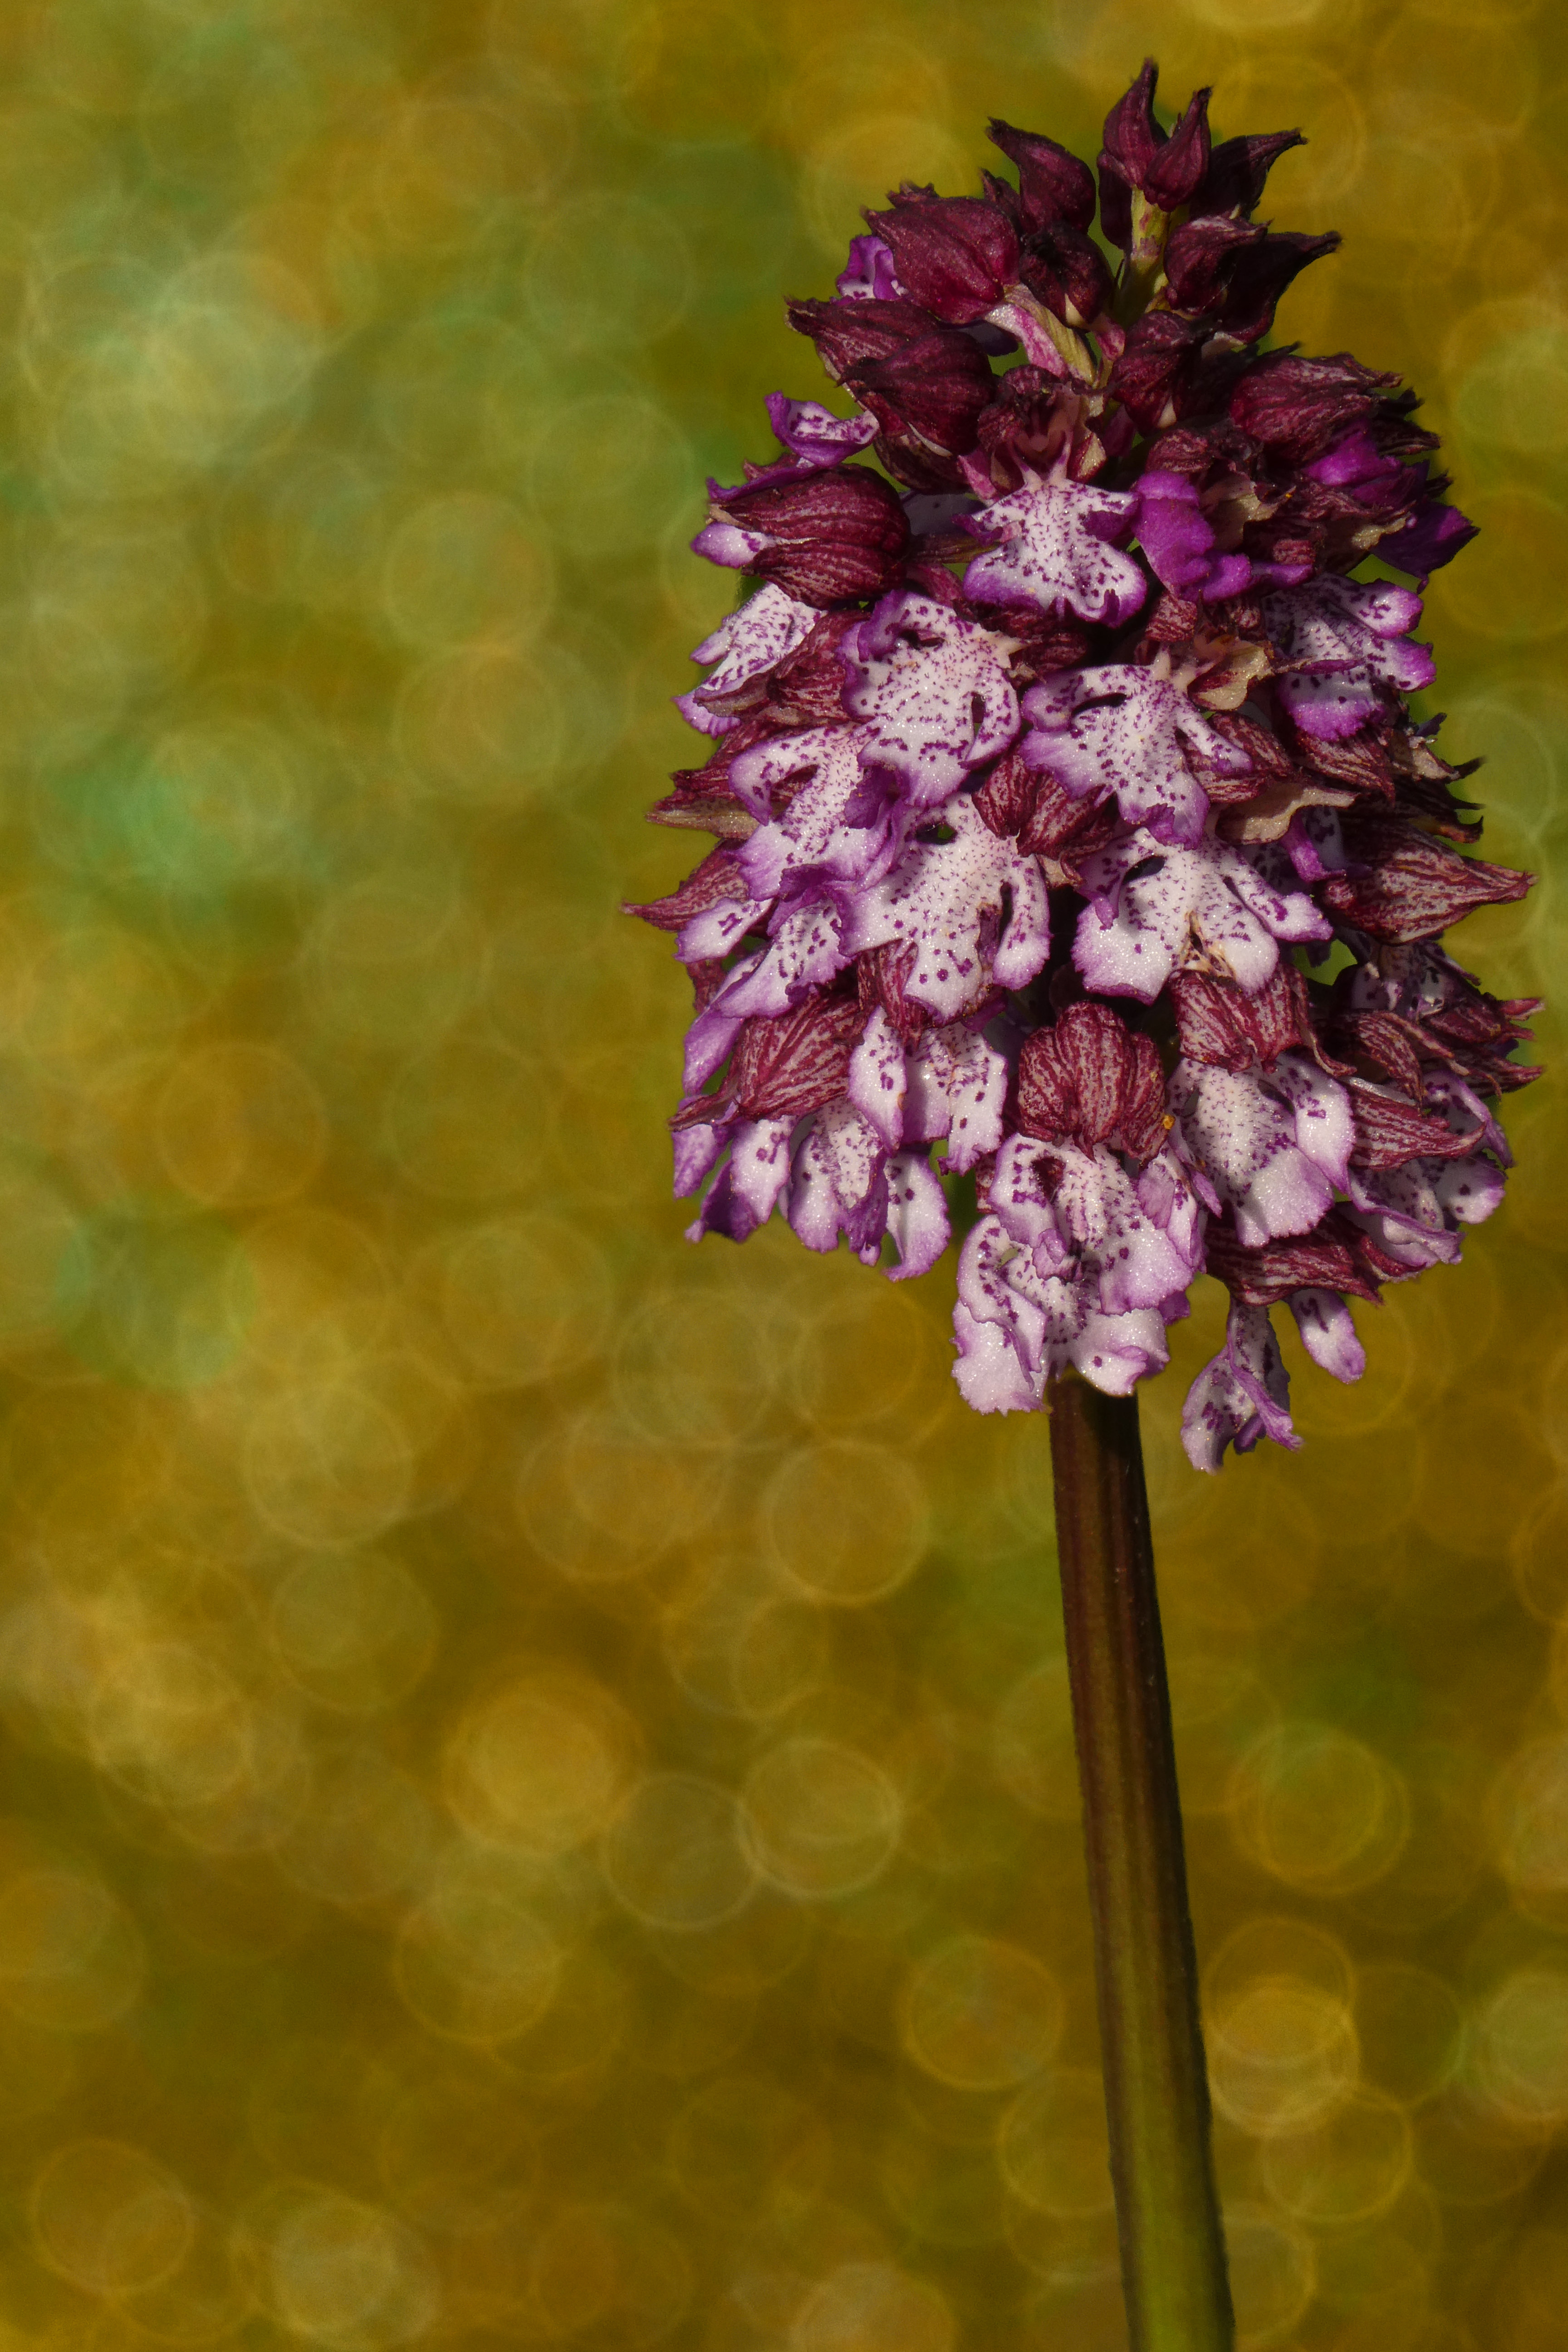
Another example of Bokeh effect.
|